Replacing Doors On Old Kitchen Cabinets: A Comprehensive Guide
Updating your kitchen can significantly enhance the aesthetics and functionality of your home. One cost-effective way to achieve a refreshed look without breaking the bank is by replacing the doors on your old kitchen cabinets. Whether your cabinet doors are outdated, damaged, or simply don't align with your current style, this comprehensive guide will provide you with the essential steps to navigate the process seamlessly.
1. Measuring and Ordering New Doors
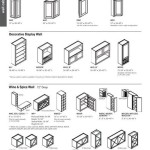
Before ordering new doors, it's crucial to accurately measure your existing doors. Remove the doors and measure their height, width, and thickness. Note any specific features, such as a raised panel or decorative molding. Once you have the measurements, browse online or visit a home improvement store to find replacement doors that match your style and budget. Ensure you consider the hinge locations and pre-drill holes to align with your cabinets.
2. Removing Old Doors
With your new doors on hand, you can proceed to remove the old ones. Start by emptying the cabinets and removing any shelves or drawers that may obstruct your access. Use a screwdriver to detach the hinges from the cabinet frames. Gently lift the doors off the hinges and set them aside.
3. Preparing the Cabinet Frames
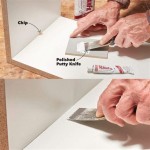
Before installing the new doors, inspect the cabinet frames for any damage or imperfections. If necessary, fill any holes or gaps with wood filler and allow it to dry. Sand the frames smooth to create a clean surface for the new doors.
4. Installing New Doors
Align the new doors with the cabinet frames, ensuring they fit snugly. Attach the hinges to the doors and frames using the appropriate screws. Tighten the screws securely but avoid overtightening. Recheck the alignment and make any necessary adjustments before fully tightening the screws.
5. Hardware Considerations
Choosing the right cabinet hardware can complement the new doors and enhance the overall aesthetic. Install new knobs or handles that fit your personal style and the scale of the doors. Ensure the screw holes on the hardware align with the pre-drilled holes in the doors for a secure installation.
6. Refinishing or Painting the Doors
If your new cabinet doors are unfinished, you may need to refinish or paint them to match the kitchen decor. Use high-quality paint or stain specifically designed for wood surfaces and apply it following the manufacturer's instructions. Allow ample time for drying between coats. Once the paint or stain is fully dry, you can install the doors and hardware.
7. Final Touches
With the new cabinet doors installed, check all the screws to ensure they are tight. Reinstall any shelves or drawers that were removed earlier. Finally, admire your newly transformed kitchen and appreciate the refreshed look it brings.
Replacing the doors on old kitchen cabinets is a relatively straightforward project that can significantly impact your kitchen's appearance. By following these steps carefully, you can achieve a professional-looking outcome and save both time and money compared to replacing the entire cabinets. Don't hesitate to seek professional assistance if you encounter any difficulties or have specific requirements beyond the scope of this guide.

Best Kitchen Cabinet Refacing For Your Home The Depot

10 Simple Ideas To Update Your Kitchen Cabinets Jenna Sue Design

Kitchen Cabinet Doors Marietta Ga Call Seth 770 595 0411

5 Tips For Installing Diy Cabinet Doors Now

Before After Refacing Showroom Display New Kitchen Cabinet Doors Cabinets

Cabinet Doors Diy Refacing Supplies Replacement Depot

Can You Replace Just The Cabinet Doors Now

10 Simple Ideas To Update Your Kitchen Cabinets Jenna Sue Design

Best Kitchen Cabinet Refacing For Your Home The Depot

How To Add Glass Cabinet Doors Confessions Of A Serial Do It Yourselfer
Related Posts


