Replacing Kitchen Cabinet Doors and Drawer Fronts: A Step-by-Step Guide
Upgrading kitchen cabinet doors and drawer fronts is a cost-effective way to give your kitchen a fresh, updated look. Whether you're looking to replace outdated hardware, match new appliances, or simply create a more cohesive design, replacing cabinet fronts is an excellent option.
This comprehensive guide will walk you through every step of the process, from selecting and purchasing new cabinet fronts to removing old hardware and installing the new ones. With detailed instructions and helpful tips, you'll be able to transform your kitchen in no time.
Step 1: Choose Your New Cabinet Fronts
The first step is to select the right cabinet fronts for your kitchen. Consider the style, color, and material of your existing cabinets, as well as your personal preferences. There are various materials to choose from, such as wood, laminate, and vinyl, each with its own advantages and disadvantages.
Step 2: Measure Your Cabinets
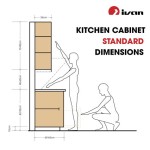
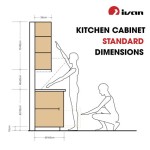
Once you have chosen your new cabinet fronts, you need to measure your existing cabinets to ensure the new fronts will fit correctly. Use a measuring tape to determine the height, width, and depth of each cabinet door and drawer front.
Step 3: Remove the Old Hardware
Before you can install the new cabinet fronts, you need to remove the old hardware. This typically involves removing the hinges, handles, and knobs. Use a screwdriver or wrench to loosen the screws and remove the hardware carefully.
Step 4: Install the New Hardware
Now it's time to install the new hardware on the cabinet fronts. Align the hinges with the holes on the cabinet frames and secure them with screws. Then, attach the handles and knobs in the desired positions.
Step 5: Adjust the Doors and Drawers
Once the hardware is installed, you need to adjust the doors and drawers to ensure they open and close properly. Use a screwdriver to tighten or loosen the screws on the hinges and adjust the height and alignment of the doors. For drawers, adjust the slides to ensure they glide smoothly.
Step 6: Final Touches
Finally, add any finishing touches to complete the look of your new cabinet fronts. This may include painting or staining the doors, adding decorative trim, or installing under-cabinet lighting. The finishing touches will help your kitchen look polished and cohesive.
Tips for Success
- Before purchasing new cabinet fronts, order samples to ensure you're satisfied with the color and material.
- Use a level to ensure the cabinet fronts are installed straight.
- Tighten all screws securely to prevent the doors and drawers from sagging.
- If you're not confident about removing and installing the cabinet fronts yourself, consider hiring a professional.
- Take your time and enjoy the transformation of your kitchen!

Kitchen Cabinet Door And Drawer Replacement Now
Ever Wonder What Happens During Refacing

How Can I Change The Look Of My Kitchen Cabinet Doors Now

Cabinet Doors Drawers Replacement Revelare Kitchens

Fast Cabinet Doors Custom Replacement For Kitchen Cabinets Cupboards

Best Kitchen Cabinet Refacing For Your Home The Depot

Kitchen Cabinet Door Replacement Tune Up Cabinets

All About Replacing Cabinet Doors New

Replace Your Cabinet Doors And Drawer Fronts With Cabinetdoormart Com

Can You Replace Just The Cabinet Doors Now
Related Posts

