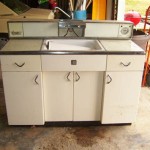
Replacing Kitchen Cabinet Doors Only: A Comprehensive Guide
Kitchen cabinets play a crucial role in defining the aesthetics and functionality of your kitchen. While the cabinet boxes themselves may last for a significant amount of time, the cabinet doors can become outdated, damaged, or simply lose their appeal over time. Replacing kitchen cabinet doors only, without having to replace the entire cabinetry system, is a cost-effective and convenient way to give your kitchen a fresh, updated look.
Replacing cabinet doors is a project that can be undertaken by homeowners with basic DIY skills and the right tools. However, it's essential to plan and prepare adequately to ensure a successful outcome. Here is a comprehensive guide to help you navigate the process of replacing kitchen cabinet doors only:
1. Planning and Preparation
Before you dive into the replacement process, it's crucial to plan and prepare thoroughly. Start by measuring your existing cabinet doors to determine the size of the new doors you need to purchase. You should also consider the style, color, and finish of the new doors to ensure they align with your kitchen's overall design.
Gather the necessary tools and materials, including a cordless drill, screwdriver, measuring tape, level, and wood filler. Ensure you have the appropriate screws and hardware for attaching the new doors to the cabinet boxes.
2. Removing the Old Doors
Once you have everything ready, it's time to remove the old cabinet doors. Start by opening the doors and locating the hinges that connect them to the cabinet boxes. Using a screwdriver, carefully remove the screws that secure the hinges to the doors.
Once the screws are removed, gently lift the doors off the hinges. If the doors are particularly heavy or difficult to remove, you may need to support them from below with a second person or a sturdy object.
3. Installing the New Doors
With the old doors removed, it's time to install the new ones. Position the new door over the hinge plates on the cabinet box and carefully align it. Use a level to ensure the door is plumb and level.
Secure the door to the hinges using the screws you previously removed. Tighten the screws until the door is firmly attached, but avoid overtightening, which can damage the hinges or the door.
4. Adjusting and Finalizing
After installing all the new doors, check their alignment and make any necessary adjustments. Use the level to ensure they are even and adjust the hinges accordingly.
Fill any visible screw holes or gaps around the doors with wood filler. Allow the filler to dry and then sand it smooth to create a seamless finish.
5. Finishing Touches
Once the doors are installed and adjusted, you can add the finishing touches. Install new cabinet handles or knobs to complete the look and enhance the functionality of your cabinets.
Clean the newly installed cabinet doors and the surrounding area to remove any sawdust or debris. Enjoy the fresh, updated look of your kitchen with the satisfaction of having replaced your cabinet doors successfully.

Reface Or Replace Your Kitchen Units Dream Doors

Reface Or Replace Your Kitchen Units Dream Doors

Can You Replace Kitchen Cabinet Doors Only Know This First

How Much Are Replacement Kitchen Doors Guide 2024

Can I Just Replace The Doors On My Cabinets Redo

Cabinet Door Replacement N Hance Wood Refinishing Of Low Country

Kitchen Cabinet Doors The Replacement Door Company

Replacing Cabinet Doors

21 Diy Affordable Ways To Redo Kitchen Cabinets Extra Space Storage

How Much Does It Cost To Replace Kitchen Cabinet Doors

