Sanding and Repainting Kitchen Cabinets: A Step-by-Step Guide
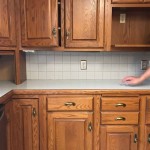
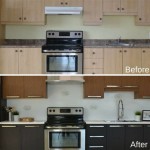
Transforming your kitchen cabinets with a fresh coat of paint can rejuvenate the entire space and give it a whole new lease on life. While the process may seem daunting, it is surprisingly straightforward with the right tools and preparation. This guide will break down the essential aspects of sanding and repainting your kitchen cabinets to help you achieve professional-looking results.
Preparation:
Before you begin sanding, it is crucial to remove all hardware and appliances from the cabinets. Clean the cabinets thoroughly to remove any dirt or grime using a degreaser or TSP (trisodium phosphate) cleaner. Ensure proper ventilation by opening windows or using a fan.
Sanding:
Start by using a coarse-grit sandpaper (80-120 grit) to remove the existing finish. Gradually move to finer grits (150-220 grit) to smooth the surface. Sand with the grain of the wood to avoid scratches. Use a sanding block for even sanding and to prevent gouging the surface.
Priming:
After sanding, apply a coat of primer to seal the wood and provide a base for the paint to adhere to. Choose a primer specifically designed for kitchen cabinets, which will resist stains and moisture. Apply thin, even coats with a brush or roller, allowing each coat to dry completely before applying the next.
Painting:
Select a paint specifically formulated for kitchen cabinets, which will withstand wear, heat, and moisture. Stir the paint thoroughly and apply it in thin, even coats. Use a brush or roller, ensuring to paint with the grain of the wood. Allow each coat to dry completely before applying the next. Apply two to three coats for optimal coverage and durability.
Reassembly:
Once the paint has dried completely, reassemble the cabinets by attaching the hardware and appliances. Take your time and ensure everything is aligned correctly. Adjust the hinges and doors to ensure smooth operation.
Tips:
- Practice on a scrap piece of wood before sanding or painting the actual cabinets.
- Use a dust mask and safety glasses during sanding.
- Allow ample drying time between each step.
- Consider using a spray gun for a smoother finish.
- Don't be afraid to ask for help or consult a professional painter if needed.
Conclusion:
Sanding and repainting kitchen cabinets is a rewarding project that can transform the look and feel of your kitchen. By following these steps and using the right tools and materials, you can achieve professional-quality results. Enjoy your newly refreshed kitchen cabinets for years to come!

How To Paint Kitchen Cabinets A Step By Guide Confessions Of Serial Do It Yourselfer

A Guide To Painting Kitchen Cabinets Norton Abrasives

Refinish Kitchen Cabinets With Kilz Restoration Primer

How To Paint Fake Wood Kitchen Cabinets Simple Made Pretty 2024

How To Paint Kitchen Cabinets A Step By Guide Confessions Of Serial Do It Yourselfer

Avoid These Mistakes How To Paint Cabinets That Are Already Painted Grace In My Space

How To Paint Kitchen Cabinets A Step By Guide Confessions Of Serial Do It Yourselfer

Afraid To Paint Kitchen Cabinets Inspiration And Information Salvage Sister Mister

Kitchen Update Choosing A Cabinet Color Monica Benavidez

6 Tips For Painting Your Kitchen Cabinets
Related Posts


