Sanding Kitchen Cabinet Doors: A Comprehensive Guide
Sanding kitchen cabinet doors is a crucial step in refreshing the appearance of a kitchen without the significant expense of replacement. Proper sanding prepares the surface for new paint or stain, ensuring optimal adhesion and a smooth, professional finish. This process, while straightforward, requires careful attention to detail and the use of appropriate techniques and materials.
The rationale behind sanding lies in its ability to remove imperfections, such as old paint, varnish, dirt, grease, and surface scratches. These imperfections can compromise the adhesion of new coatings, leading to peeling, chipping, and an overall unsatisfactory result. Sanding also creates a slightly textured surface, often referred to as a "tooth," which provides a better grip for the new finish. This textured surface is critical for achieving a durable and long-lasting paint job.
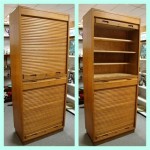
Before embarking on the sanding process, it's essential to understand the different types of cabinet doors and their construction. Common materials include solid wood, wood veneer, laminate, and MDF (Medium-Density Fiberboard). Each material requires a slightly different approach to sanding to avoid damage and ensure optimal results. Solid wood is the most forgiving, while veneer and laminate require a more delicate touch to prevent sanding through the thin surface layer. MDF can also be sanded, but it produces a very fine dust that requires proper ventilation and respiratory protection.
Preparing for Sanding: Materials and Workspace Setup
Successful sanding begins with proper preparation. This includes gathering the necessary materials and setting up a suitable workspace. Essential materials include sandpaper of varying grits, a sanding block or orbital sander, a tack cloth, cleaning supplies, and appropriate safety gear.
Sandpaper is classified by its grit number, which indicates the size of the abrasive particles. Lower grit numbers (e.g., 80-grit) are coarser and are used for removing old paint or varnish and for leveling imperfections. Higher grit numbers (e.g., 220-grit to 320-grit) are finer and are used for smoothing the surface and preparing it for painting or staining. Using a range of grits ensures a progressively smoother surface.
A sanding block or orbital sander provides a flat, even surface for sanding. A sanding block is useful for manual sanding, especially in tight corners and detailed areas. An orbital sander, on the other hand, is a power tool that speeds up the sanding process and is particularly useful for larger, flat surfaces. When using an orbital sander, it's important to maintain a consistent pressure and avoid staying in one spot for too long, as this can create uneven sanding and swirl marks.
A tack cloth is a sticky cloth used to remove dust particles from the sanded surface. This is essential for ensuring a clean surface for painting or staining. Cleaning supplies, such as a degreaser and a clean cloth, are necessary for removing grease and dirt from the cabinet doors before sanding.
Safety gear is paramount when sanding. This includes a dust mask or respirator to protect against inhaling dust particles, safety glasses to protect the eyes, and gloves to protect the hands. Sanding, especially with power tools, can generate a significant amount of dust, which can be harmful to the respiratory system and eyes. A well-ventilated workspace is also crucial for minimizing dust exposure.
The workspace should be clean, well-lit, and free from obstructions. Laying down a drop cloth or plastic sheeting protects the surrounding area from dust and debris. Ideally, the workspace should be located in a garage, workshop, or outdoors, but if sanding indoors, ensure adequate ventilation by opening windows and doors or using a dust collection system.
The Sanding Process: Step-by-Step Instructions
The sanding process involves several steps, each contributing to the final result. The first step is to remove the cabinet doors from their hinges and remove all hardware, such as knobs and pulls. This allows for easier access to all surfaces of the door and prevents damage to the hardware during sanding.
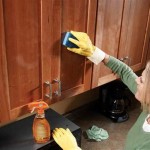
Next, clean the cabinet doors thoroughly with a degreaser to remove any grease or dirt. This is particularly important in the kitchen, where cabinet doors are often exposed to cooking grease and food splatters. Allow the degreaser to dry completely before proceeding with sanding.
Begin sanding with a coarser grit sandpaper, such as 80-grit or 100-grit, to remove any old paint or varnish and to level out any imperfections. Apply consistent pressure and use long, even strokes. Avoid pressing too hard, as this can create uneven sanding. If using an orbital sander, move the sander in a circular motion and avoid staying in one spot for too long.
After sanding with the coarser grit sandpaper, switch to a medium-grit sandpaper, such as 120-grit or 150-grit, to smooth the surface and remove any remaining imperfections. Use the same sanding technique as before, applying consistent pressure and using long, even strokes.
Finally, finish sanding with a fine-grit sandpaper, such as 220-grit or 320-grit, to create a smooth, even surface that is ready for painting or staining. This step is crucial for achieving a professional-looking finish. Sand lightly and evenly, focusing on removing any remaining scratches or imperfections.
After each sanding step, wipe down the cabinet doors with a tack cloth to remove dust particles. This ensures a clean surface for the next sanding step. Once the final sanding step is complete, wipe down the cabinet doors thoroughly with a tack cloth to remove all remaining dust.
Inspect the sanded surface carefully for any remaining imperfections. If any imperfections are found, sand them down with the appropriate grit sandpaper and wipe down the surface with a tack cloth.
Addressing Specific Cabinet Door Materials and Issues
Different cabinet door materials require different approaches to sanding. Solid wood cabinet doors are the most forgiving and can withstand more aggressive sanding if necessary. However, it's still important to avoid over-sanding, as this can create unevenness and damage the wood.
Wood veneer cabinet doors have a thin layer of wood veneer adhered to a substrate, such as MDF or particleboard. This thin layer is easily sanded through, so it's crucial to use a fine-grit sandpaper and a light touch when sanding veneer. Avoid using an orbital sander on veneer, as it can be too aggressive. Instead, use a sanding block and sand by hand.
Laminate cabinet doors have a plastic laminate surface adhered to a substrate. Laminate is very difficult to sand and is not typically recommended for painting or staining. However, if sanding laminate is necessary, use a very fine-grit sandpaper and a light touch. Be aware that sanding laminate can damage the surface and may not provide a suitable surface for paint adhesion.
MDF cabinet doors are made from Medium-Density Fiberboard, which is a composite wood product. MDF sands easily but produces a very fine dust that requires proper ventilation and respiratory protection. Use a sanding block or orbital sander and sand evenly, avoiding over-sanding.
When dealing with cabinet doors that have intricate details or moldings, use a sanding sponge or a detail sander to access hard-to-reach areas. These tools are designed to conform to the shape of the detail and provide a more even sanding surface.
If the cabinet doors have deep scratches or gouges, use a wood filler to fill in the imperfections before sanding. Allow the wood filler to dry completely and then sand it smooth with the surrounding surface. This will create a more even surface for painting or staining.
For cabinet doors that have been previously painted or stained, it's important to remove as much of the old finish as possible before sanding. This can be done with a paint stripper or by using a coarser grit sandpaper. Be careful not to damage the underlying wood when removing the old finish.
Ultimately, the goal of sanding kitchen cabinet doors is to create a smooth, even surface that is ready for painting or staining. By following these steps and using the appropriate techniques and materials, a professional-looking result can be achieved, enhancing the appearance and value of the kitchen.

A Guide To Painting Kitchen Cabinets Norton Abrasives

How To Paint Kitchen Cabinets A Step By Guide Confessions Of Serial Do It Yourselfer

A Guide To Painting Kitchen Cabinets Norton Abrasives

How To Paint Kitchen Cabinets A Step By Guide Confessions Of Serial Do It Yourselfer

Refinishing Kitchen Cabinets Modern Refacing Made Easy Wisewood

Refinishing Kitchen Cabinets A Beautiful Mess

The Right Way To Prep Cabinets For Paint Young House Love

How To Paint Kitchen Cabinets Forbes Home

Refinish Kitchen Cabinets With Kilz Restoration Primer

Can You Paint Mdf Cabinets Pa Kitchen
Related Posts