Sanding Kitchen Cabinets After Primer: A Comprehensive Guide
Achieving a professional, durable finish on kitchen cabinets requires meticulous preparation. Priming is a crucial step in this process, serving as a bonding layer between the cabinet surface and the final coat of paint. However, the primer itself often needs refinement before the painting process can commence. Sanding after priming is vital for creating a smooth, uniform surface that will enhance the appearance and longevity of the painted finish. This article provides a detailed exploration of the importance of sanding primed kitchen cabinets, the appropriate techniques, and the necessary tools.
The primary purpose of primer is to create a consistent base for paint adhesion. It fills minor imperfections, blocks stains, and ensures the paint adheres properly to the cabinet surface, whether it's wood, laminate, or a previously painted finish. However, during the application process, primer can develop imperfections such as drips, runs, brush strokes, or raised wood grain. These imperfections, if left unaddressed, will be amplified by subsequent coats of paint, resulting in an unprofessional and uneven finish. Sanding the primed surface removes these imperfections, creating a smooth and even plane for the final coat to adhere to.
Furthermore, the act of priming itself can sometimes raise the grain of the wood, particularly with water-based primers. This occurs when the water in the primer penetrates the wood fibers, causing them to swell. While this effect is more pronounced with raw wood, even previously finished cabinets can experience some degree of grain raising after priming. Sanding after priming effectively knocks down this raised grain, preventing it from telegraphing through the paint and creating a textured surface where a smooth one is desired.
Choosing the right sandpaper grit is essential for achieving the desired results without damaging the primed surface. Too coarse a grit will remove too much material and create unwanted scratches, while too fine a grit may not effectively remove imperfections. The ideal grit range for sanding after primer typically falls between 220 and 320 grit. A 220-grit sandpaper is suitable for removing significant imperfections and leveling the surface, while a 320-grit sandpaper provides a finer refinement for achieving an ultra-smooth finish. Ultimately, the appropriate grit will depend on the type of primer used, the existing surface condition, and the desired level of smoothness.
Before beginning the sanding process, it is crucial to ensure that the primer is completely dry. Refer to the manufacturer's instructions for the recommended drying time, which can vary depending on the primer type and environmental conditions such as humidity and temperature. Sanding wet or partially dry primer will result in clumping, uneven removal, and a generally poor finish. Patience is key at this stage to ensure optimal results.
Key Point 1: Essential Tools and Materials
Successfully sanding primed kitchen cabinets necessitates the use of specific tools and materials. The following is a list of essential items:
Sandpaper: As previously mentioned, sandpaper in the range of 220 to 320 grit is recommended. It is advisable to have both grits on hand to address varying degrees of imperfections. Consider purchasing a higher quality sandpaper designed for fine finishing, as it tends to be more durable and produce a more consistent scratch pattern.
Sanding Block or Pad: A sanding block or pad provides a firm, flat surface for the sandpaper, ensuring even pressure and preventing the sandpaper from conforming to any underlying imperfections. A rubber sanding block is a versatile option, while a foam sanding pad is ideal for contoured surfaces.
Dust Mask or Respirator: Sanding primer generates fine dust particles that can be harmful to the respiratory system. A dust mask or, preferably, a respirator is essential for protecting the lungs. Ensure the mask or respirator fits properly and provides adequate filtration.
Tack Cloth or Microfiber Cloth: After sanding, thoroughly remove all dust particles from the surface using a tack cloth or a slightly dampened microfiber cloth. A tack cloth is a sticky cloth specifically designed to pick up dust, while a microfiber cloth offers excellent dust-collecting properties without leaving any residue.
Vacuum Cleaner with Brush Attachment: A vacuum cleaner with a brush attachment can be used to remove loose dust from the sanded surface and the surrounding work area. This helps to prevent dust from settling back onto the cabinets and contaminating the subsequent coats of paint.
Work Light: A work light is crucial for illuminating the surface and highlighting any imperfections that may be difficult to see under normal lighting conditions. A bright, adjustable work light allows for close inspection of the sanded surface and ensures thorough and even sanding.
Key Point 2: Proper Sanding Technique
The sanding technique employed significantly impacts the final outcome. The goal is to remove imperfections and create a smooth, even surface without damaging the primer or underlying cabinet material. Here's a step-by-step guide to proper sanding technique:
Start with a Visual Inspection: Before sanding, carefully inspect the primed surface for any obvious imperfections, such as drips, runs, brush strokes, or raised grain. Mark these areas with a pencil if necessary, to ensure they are adequately addressed during the sanding process.
Wrap the Sandpaper Around the Block or Pad: Securely wrap the sandpaper around the sanding block or pad, ensuring it is held firmly in place. A loose or improperly secured sandpaper can result in uneven sanding and damage to the surface.
Apply Light, Even Pressure: Use light, even pressure when sanding. Avoid pressing too hard, as this can create gouges or scratches in the primer. Let the sandpaper do the work, and focus on maintaining consistent pressure across the entire surface.
Sand in the Direction of the Grain: When sanding wood cabinets, always sand in the direction of the grain. Sanding against the grain can create scratches that are difficult to remove and will be visible through the paint. For non-wood surfaces like laminate, a circular or random orbital sanding pattern may be more effective.
Use Overlapping Strokes: Overlap each sanding stroke slightly to ensure complete coverage and avoid leaving any unsanded areas. This creates a seamless, uniform surface.
Focus on Imperfections: Pay particular attention to areas with imperfections, such as drips or runs. Gently sand these areas until they are level with the surrounding surface. Avoid sanding too aggressively, as this can remove too much primer and expose the underlying cabinet material.
Frequently Clean the Sandpaper: As you sand, the sandpaper will become clogged with dust. Clean the sandpaper frequently by tapping it against a hard surface or using a sandpaper cleaning stick. A clogged sandpaper is less effective and can leave scratches on the surface.
Check Your Progress: Periodically check your progress by wiping the sanded surface with a tack cloth or microfiber cloth. This will remove dust and allow you to see any remaining imperfections. Use a work light to illuminate the surface and highlight any areas that need further sanding.
Key Point 3: Addressing Specific Issues
Certain issues may require specific attention during the sanding process. Understanding how to address these issues effectively is crucial for achieving a flawless finish.
Dealing with Raised Grain: If the primer has raised the grain of the wood, use a 220-grit sandpaper to gently knock down the raised fibers. Sand in the direction of the grain with light pressure, and avoid sanding too aggressively. After sanding, thoroughly remove all dust and apply another thin coat of primer to seal the wood.
Smoothing Drips and Runs: Drips and runs in the primer can be challenging to remove. Start by using a utility knife or scraper to carefully remove the bulk of the drip or run. Then, use a 220-grit sandpaper to smooth the remaining imperfection. Be careful not to sand too aggressively, as this can remove too much primer and expose the underlying cabinet material.
Removing Brush Strokes: Brush strokes can be minimized by using a high-quality brush and applying the primer in thin, even coats. If brush strokes are still visible after priming, use a 320-grit sandpaper to gently smooth them out. Sand in the direction of the strokes with light pressure.
Repairing Damaged Primer: If the primer is damaged during sanding, or if you accidentally sand through the primer to the underlying cabinet material, apply another thin coat of primer to the affected area. Allow the primer to dry completely before sanding again.
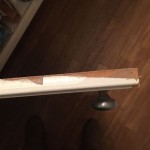
Sanding Edges and Corners: Edges and corners are particularly susceptible to damage during sanding. Use a light touch and avoid applying too much pressure. A foam sanding pad is ideal for sanding contoured surfaces and edges.
After sanding, meticulous dust removal is paramount. A tack cloth is the preferred method for picking up fine dust particles. Alternatively, a microfiber cloth, lightly dampened, can be used. Multiple passes may be necessary to ensure all dust is removed. Once the surface is clean, it is ready for the application of the final coat of paint, resulting in a smooth, professional, and durable finish.

Refinish Kitchen Cabinets With Kilz Restoration Primer

How To Prime Cabinets For A Smooth Finish The Turquoise Home

Tips Tricks For Painting Oak Cabinets Evolution Of Style

How To Paint Kitchen Cabinets A Step By Guide Confessions Of Serial Do It Yourselfer

Refinishing Kitchen Cabinets A Beautiful Mess

How To Paint Kitchen Cabinets A Step By Guide Confessions Of Serial Do It Yourselfer

A Guide To Painting Kitchen Cabinets Norton Abrasives

How To Prime Cabinets For A Smooth Finish The Turquoise Home

How To Paint Kitchen Cabinets Without Sanding Or Priming

Can You Paint Kitchen Cabinets Without Sanding
Related Posts