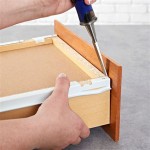
Sanding Kitchen Cabinets by Hand: A Comprehensive Guide
Sanding kitchen cabinets is a crucial step in refinishing them, as it prepares the surface for a smooth, even finish. While it can be a tedious process, it's essential for achieving a professional-looking result. Here's a comprehensive guide to sanding kitchen cabinets by hand, ensuring you get the best possible results:Materials You'll Need:
- Sandpaper (various grits: 80, 120, 180, 220) - Sanding block or sponge - Dust mask - Safety glasses - Vacuum cleanerStep 1: Safety First
Before you start sanding, ensure you wear a dust mask and safety glasses to protect yourself from dust and debris. Open windows or doors to improve ventilation and minimize dust accumulation.Step 2: Remove Doors and Hardware
For easier sanding, remove cabinet doors and any hardware, such as handles or knobs. Label the hardware so you know where it goes when finished.Step 3: Start with Coarse Grit Sandpaper
Begin sanding with 80-grit sandpaper to remove any existing finish or paint. Use a sanding block or sponge for even pressure and to avoid creating grooves. Sand with the grain of the wood to prevent scratching.Step 4: Gradually Reduce Grit
Once you've removed the old finish, switch to 120-grit sandpaper to smooth out the surface. Continue sanding with finer grits (180 and 220) to refine the finish and remove any remaining scratches.Step 5: Sand in Tight Spaces
For areas that are difficult to reach, such as corners or molding, use a sanding sponge or a piece of sandpaper wrapped around a dowel. This will allow you to get into the tightest spots and achieve a uniform finish.Step 6: Vacuum Regularly
Throughout the sanding process, vacuum frequently to remove dust and debris. This will prevent dust from clogging the sandpaper and ensure a smooth finish.Step 7: Check Your Progress
As you sand, check your progress regularly. If you notice any uneven spots or scratches, go back and sand those areas with a finer grit. Aim for a smooth, even surface that's free of any rough patches.Step 8: Clean the Cabinets
Once you're satisfied with the sanded surface, wipe down the cabinets with a damp cloth to remove any remaining dust. Allow them to dry completely before applying any finishes. By following these steps, you can effectively sand your kitchen cabinets by hand and prepare them for a flawless finish. With patience and attention to detail, you'll achieve a professional-looking result that will enhance the beauty and functionality of your kitchen.
A Guide To Painting Kitchen Cabinets Norton Abrasives

A Guide To Painting Kitchen Cabinets Norton Abrasives

The Right Way To Prep Cabinets For Paint Young House Love

A Guide To Painting Kitchen Cabinets Norton Abrasives

How To Paint Kitchen Cabinets A Step By Guide Confessions Of Serial Do It Yourselfer

A Step By Guide How To Paint Kitchen Cabinets For Stunning Transformation Earthborn Paints

9 Biggest Mistakes To Avoid When Painting Kitchen Cabinets

The Best Sanders For Cabinets Including Orbital And Palm Models

Sanding Techniques For Cabinets Get The Perfect Finish Cabinet Doors N More

How To Paint Kitchen Cabinets A Step By Guide Confessions Of Serial Do It Yourselfer
Related Posts


