Spray Painting Kitchen Cabinets: Before and After
The kitchen is often considered the heart of the home, a space where families gather, meals are prepared, and memories are made. Over time, however, kitchen cabinets can become faded, chipped, or simply outdated. If you're looking for a cost-effective way to refresh your kitchen without a full remodel, spray painting your cabinets can be a transformative solution. This article explores the process of spray painting kitchen cabinets, outlining the steps involved and providing insights into the remarkable before-and-after results you can achieve.
1. Preparation: The Foundation for Success
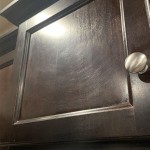
The key to a successful spray paint job lies in meticulous preparation. This stage involves removing all cabinet doors and drawers, taking them apart if needed, and cleaning them thoroughly. Any existing finishes must be sanded down to ensure proper adhesion of the new paint. This may involve using a deglosser to remove shine and a fine-grit sandpaper to create a smooth surface. If needed, apply a primer that is compatible with the chosen paint. This step helps to create a uniform base, promoting better paint adhesion and preventing the old finish from bleeding through.
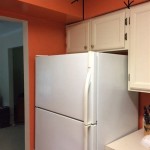
Next, masking off any areas that should not be painted. This may include countertops, walls, appliances, and hardware. Use painter's tape to create clean lines and protect these surfaces from overspray. Finally, ensure the work area is well-ventilated, as spray paint fumes can be harmful.
2. Applying the Paint: Technique and Precision
Once everything is prepped, it's time to apply the paint. Spray painting requires a steady hand and a light touch. Use even, overlapping strokes, ensuring that the paint is applied in thin, even coats. Avoid thick layers, as this can result in drips and an uneven finish. One or two light coats are often better than one heavy coat. Allow each coat to dry completely before applying the next. If using multiple coats, it may be helpful to lightly sand between each application for a smoother finish.
For best results, consider using a spray gun for applying the paint. This allows for more control over the application process, ensuring a consistent, even finish. However, for smaller projects or DIY enthusiasts, a spray can is a suitable alternative. Be sure to choose a paint specifically designed for kitchen cabinets, as it will be more durable and resistant to stains and moisture.
3. Aftercare: Sealing in the Transformation
After the paint dries, it's important to seal the cabinets to protect them from the wear and tear of everyday use. A clear polyurethane sealer is a good choice for this purpose. It creates a durable, protective layer that helps to prevent scratches, chips, and stains.
Apply the sealer in thin, even coats, allowing each coat to dry completely before applying the next.
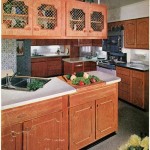
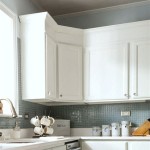
4. The Before and After: A New Look for Your Kitchen
The transformation of your kitchen cabinets after spray painting can be quite dramatic. A fresh coat of paint can instantly modernize the look of your kitchen, making it feel brighter, cleaner, and more inviting. The before-and-after difference will depend on the original paint and the chosen color. For instance, changing from a dark wood to a light, airy white can create a more spacious and contemporary feel.
If you are looking for a subtle refresh, choosing a color that complements your existing décor can create a sense of harmony and cohesiveness. Spray painting kitchen cabinets can also be an opportunity to experiment with bolder color choices or accent colors to add personality and style to your kitchen.

Spray Painting Kitchen Cabinets Refurbished Makeover

Kitchen Spray Painting The Facelift Company

Here S How To Spray Paint Kitchen Cabinets Old New Before And After

How To Spray Paint Kitchen Units Pintyplus

Refinishing And Painting Kitchen Cabinets Before After Pictures

Want To Find Out How Spray Paint Kitchen Cabinets Like A Pro

Kitchen Cabinet Colors Before After The Inspired Room

Are Your Kitchen Cabinets Dated Before After Photos The Purple Painted Lady

Toronto Kitchen Cabinets Spray Painting Gallery Royal Home Painters Richmond Hill Markham

How To Paint Kitchen Cabinets A Step By Guide Confessions Of Serial Do It Yourselfer
Related Posts