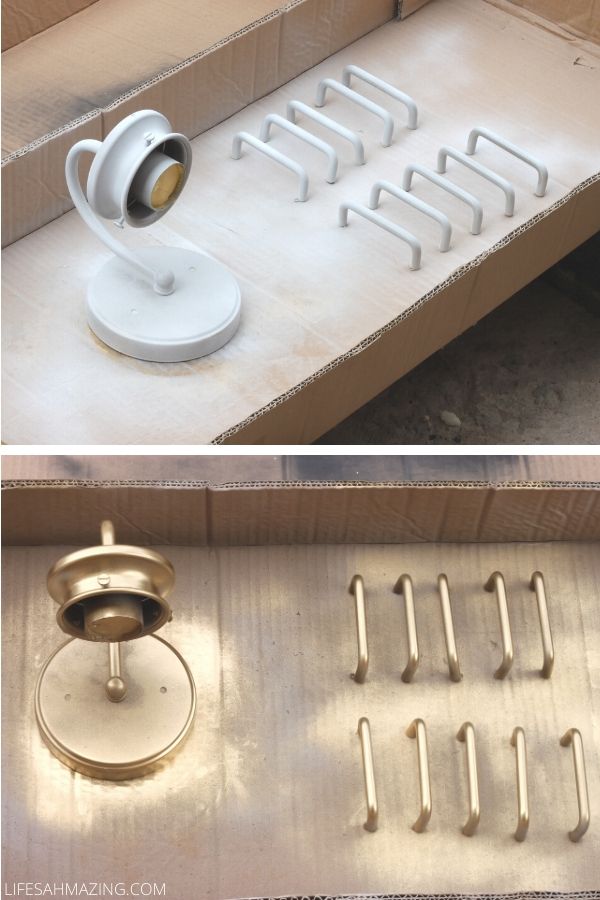
Revitalize Your Kitchen: Spray Painting Cupboard Handles
Kitchen cupboard handles are often overlooked, but they play a crucial role in both the functionality and aesthetics of the space. Over time, these handles can become worn, scratched, or simply outdated, diminishing the overall appeal of the kitchen. Fortunately, a simple and cost-effective solution exists: spray painting. Spray painting kitchen cupboard handles allows homeowners to refresh their cabinets without undertaking a full renovation, bringing new life to the kitchen with minimal effort and expense.
Benefits of Spray Painting Cupboard Handles
Spray painting offers several advantages over other methods for refreshing cupboard handles. First, it provides a smooth and even finish, particularly beneficial for intricate handle designs. Second, spray paint adheres well to various materials, making it suitable for metal, plastic, and even wood handles. Lastly, the process is relatively quick and easy, requiring minimal tools and expertise. This makes it a viable option for homeowners of all skill levels.
Preparing the Cupboard Handles for Painting
Successful spray painting hinges on proper preparation. Before applying any paint, it is essential to clean the handles thoroughly. This involves removing any dirt, grease, or residue using a mild detergent and a soft cloth. Once clean, allow the handles to dry completely. Next, if necessary, remove any existing paint or coatings with fine-grit sandpaper to ensure proper adhesion of the new paint. Finally, apply masking tape to protect areas that should not be painted, such as the screws or any decorative elements.
The Spray Painting Process
The spray painting process itself requires a steady hand and a well-ventilated space. It is also crucial to wear appropriate safety gear, including a mask and gloves, to prevent inhaling paint fumes and skin irritation. Start by shaking the paint can vigorously for several minutes to ensure that the contents are well mixed. Hold the can approximately 6-8 inches away from the handle and spray evenly in a smooth, sweeping motion. Multiple thin coats, applied in intervals, will ensure a smooth and consistent finish. Allow each coat to dry completely before applying the next. It is recommended to apply at least two coats for optimal coverage and durability.
Choosing the Right Paint
The type of paint used will significantly impact the final result. For kitchen cupboard handles, it is advisable to choose a durable and easy-to-clean paint, such as a high-gloss enamel or a satin finish. Enamel paints are known for their resistance to scratches and stains, making them ideal for high-traffic areas. Satin finishes provide a slightly less glossy look, but they are still durable and easy to wipe clean. Consider the existing kitchen décor when selecting the paint color, opting for a complementary shade or a bold accent color to create a statement.
Protecting the New Finish
Once the paint is fully dry, it is essential to protect the new finish. This involves applying a clear sealant, such as polyurethane or acrylic varnish, to the handles. The sealant provides an extra layer of protection against wear and tear, making the handles more resistant to scratches and water damage. Sealants also enhance the color and longevity of the paint, ensuring that the handles stay vibrant and beautiful for years to come.
By undertaking a simple spray painting project, homeowners can transform the look and feel of their kitchen cabinets without significant expense or effort. The refreshed handles will not only enhance the aesthetic appeal of the space but also provide a sense of renewal and satisfaction, making the kitchen feel fresh and welcoming.

Painted Cabinet Hardware Rust Oleum

Spray Paint Brass Kitchen Knobs Cabinet Pulls

How To Spray Paint Cabinet Hardware And Hinges Life S Ahmazing

Yes You Can Spray Paint Cabinet Hardware Porch Daydreamer

How To Spray Paint Kitchen Cabinet Hardware Thrifty Decor Diy And Organizing

Diy Brass Painted Kitchen Hardware Lavender Julep

Spray Paint Brass Kitchen Knobs Cabinet Pulls

How To Spray Paint Kitchen Cabinet Hardware Thrifty Decor Diy And Organizing

How To Spray Paint Cabinet Hardware And Hinges Life S Ahmazing

How To Paint Hardware Or Metal Handles For Your Kitchen Cabinets Angie Holden The Country Chic Cottage
Related Posts


