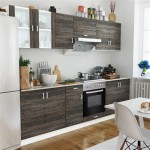
Spraying Chalk Paint On Kitchen Cabinets: A Comprehensive Guide
Transforming kitchen cabinets with chalk paint can elevate the aesthetics of your kitchen space and bring a touch of vintage charm. While painting cabinets with a brush is a common technique, spraying chalk paint offers several advantages, including a smooth, even finish, reduced brushstrokes, and faster application time.
Materials Required
To successfully spray chalk paint on kitchen cabinets, you'll need the following materials:
- Chalk paint
- Spray gun
- Sandpaper (120-grit and 220-grit)
- Tack cloth
- Primer (optional)
- Polyurethane topcoat
Step 1: Preparation
Before spraying, it's crucial to prepare the cabinet surfaces for optimal paint adhesion. Begin by removing cabinet doors and hardware. Use 120-grit sandpaper to gently sand the surfaces, removing any existing finish or imperfections. Wipe away dust with a damp tack cloth.
Step 2: Priming (Optional)
While not always necessary, applying a primer can enhance paint adhesion, especially on glossy or porous surfaces. If desired, spray a thin, even coat of primer and allow it to dry completely before proceeding.
Step 3: Setting Up the Spray Gun
Properly setting up the spray gun is essential for a smooth finish. Adjust the nozzle size to match the viscosity of the chalk paint. The ideal nozzle size is typically between 1.4mm and 1.8mm. Dilute the chalk paint according to the manufacturer's instructions to achieve a sprayable consistency.
Step 4: Test Spraying
Before spraying directly onto the cabinets, practice on a scrap piece of wood or cardboard. Adjust the spray gun's pressure and air flow until you achieve an even, consistent spray pattern. This step helps avoid uneven paint distribution and splattering on your cabinets.
Step 5: Spraying
Begin spraying the cabinets with even strokes, overlapping each pass slightly. Hold the spray gun perpendicular to the surface and maintain a constant distance of 6-8 inches. Apply thin, multiple coats to build up coverage, allowing each coat to dry completely before applying the next.
Step 6: Drying
Allow the painted cabinets to dry thoroughly before reassembling them. Drying times vary depending on the paint and drying conditions, but typically range from 12 to 48 hours. Avoid touching or moving the cabinets during this time to prevent smudging.
Step 7: Finishing
Once the paint has dried, apply a polyurethane topcoat to protect the finish and enhance its durability. Use a brush or sprayer to apply a thin, even coat, following the manufacturer's instructions. Allow the topcoat to dry completely before reattaching the hardware and reinstalling the cabinets.
Conclusion
Spraying chalk paint on kitchen cabinets is a rewarding project that can transform your kitchen space. By following these steps and paying attention to details, you can achieve a professional-looking finish that will enhance the aesthetics and functionality of your home for years to come.

Painting Kitchen Cabinets With Chalk Paint Simply Today Life

How To Paint A Kitchen With Chalk Maison De Pax

Chalk Painted Kitchen Cabinets 2 Years Later Our Storied Home

Step By Kitchen Cabinet Painting With Annie Sloan Chalk Paint Jeanne Oliver

Why I Repainted My Chalk Painted Cabinets Sincerely Sara D Home Decor Diy Projects

Painting Kitchen Cabinets With Chalk Paint Simply Today Life

Why I Repainted My Chalk Painted Cabinets Sincerely Sara D Home Decor Diy Projects

Chalk Painted Kitchen Cabinets 2 Years Later Our Storied Home

Kitchen Cabinet Q A From Customer The Purple Painted Lady

Why I Repainted My Chalk Painted Cabinets Sincerely Sara D Home Decor Diy Projects

