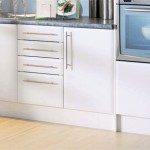
Staining Birch Wood Kitchen Cabinets: A Comprehensive Guide
Birch wood kitchen cabinets, beloved for their creamy coloration and subtle grain patterns, offer a timeless elegance to any kitchen space. Whether you're revamping outdated cabinetry or seeking to enhance the character of your existing kitchen, staining birch wood is an excellent way to transform the aesthetics and protect its beauty for years to come.
1. Preparation: Sanding and Cleaning
Before applying stain, the cabinet surfaces must be meticulously sanded. This ensures a smooth, even finish and allows the stain to penetrate the wood effectively. Use fine-grit sandpaper (120-180 grit) and sand in the direction of the wood grain. Thoroughly remove sanding dust with a clean cloth or vacuum cleaner.
Next, clean the cabinets using a damp cloth and a mild detergent solution. Allow the cabinets to dry completely before proceeding with staining.
2. Choosing the Right Stain
The type of stain you choose will significantly impact the final appearance of your cabinets. Birch wood readily accepts stains, making it suitable for a wide range of colors and finishes.
For a natural look, consider using a light stain such as Golden Oak or Early American. For a darker, richer tone, opt for stains like Jacobean or Espresso. Always test the stain on an inconspicuous area of the cabinet first to ensure the desired outcome.
3. Applying the Stain
To apply the stain, use a clean brush, sponge, or cloth. Work in the direction of the wood grain, ensuring even coverage. Allow the stain to penetrate for the recommended time specified on the product label.
For a more intense color, apply additional coats of stain. However, allow each coat to dry thoroughly before applying the next.
4. Wiping Off the Excess
Once the stain has penetrated, use a clean cloth to wipe away any excess. This prevents smudging and streaks. Work in the direction of the wood grain to avoid disturbing the stained surface.
Allow the stain to cure completely according to the manufacturer's instructions before proceeding with the next step.
5. Finishing with Polyurethane
To protect the stained cabinets and enhance their durability, apply a polyurethane finish. Polyurethane is a clear, protective coating that seals the wood and provides resistance to wear and tear.
Use a brush or foam applicator to apply a thin, even coat of polyurethane. Allow the first coat to dry completely before sanding it lightly with fine-grit sandpaper (220-320 grit). This creates a smooth surface for subsequent coats.
Apply additional coats of polyurethane until you achieve the desired level of protection and sheen. Allow the final coat to cure completely before using the cabinets.
Conclusion
Staining birch wood kitchen cabinets is a rewarding project that can revitalize the appearance of your kitchen. By carefully following the steps outlined in this guide, you can achieve a professional-looking finish that will last for years to come. Remember to use high-quality materials, work in a well-ventilated area, and allow ample time for drying and curing.

Pros And Cons Of Birch Kitchen Cabinets Stain Colors On Wood

Pros And Cons Of Birch Kitchen Cabinets Stain Colors On Wood

Birch Cabinets All You Need To Know

Birch Cabinets All You Need To Know

Staining Birch

Birch Cabinets All You Need To Know

The Best Wood Stains For Birch Plywood

All Solid Birch Wood Kitchen Cabinets Rta Espresso Stained China Modern Cabinet American Made In Com

Show Me Your Stained And Unstained Birch Slabs Cabinets Craftsman Kitchen Staining

Birch Cabinets Kitchen Cabinetselect Com
Related Posts


