```html
Staining Kitchen Cabinets Without Sanding: A Comprehensive Guide
Refinishing kitchen cabinets can dramatically alter the aesthetic of a kitchen, breathing new life into a space without the expense of a complete remodel. While traditional methods involve sanding to prepare the surface for stain, alternative techniques allow for staining cabinets without the often laborious and time-consuming process of sanding. This method focuses on thorough cleaning, deglossing, and the use of specialized bonding primers to ensure the stain adheres properly and provides a durable finish.
The decision to stain kitchen cabinets without sanding often stems from a desire to minimize dust, reduce the time commitment, and preserve the integrity of the cabinet's original construction. Older cabinets, in particular, might be delicate and prone to damage from aggressive sanding. Furthermore, cabinets with intricate details can be challenging to sand evenly. This method offers a viable alternative for homeowners seeking a refreshed look without the potential pitfalls of traditional sanding.
Key Point 1: Preparation is Paramount
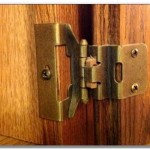
Successful staining without sanding hinges on meticulous preparation. The goal is to create a clean, receptive surface that allows the stain to bond effectively. This involves several crucial steps, starting with the removal of all hardware, including knobs, pulls, hinges, and drawer slides. Labeling each piece of hardware and its corresponding location is highly recommended to ensure easy reassembly after the staining process is complete.
The next step is a comprehensive cleaning. Grease, food splatters, and accumulated grime can prevent the stain from adhering properly, resulting in an uneven and unsatisfactory finish. A strong degreaser, specifically designed for kitchen cabinets, should be used. Apply the degreaser according to the manufacturer's instructions, paying particular attention to areas around the stove and sink, where grease and food residue are typically more prevalent. Rinse thoroughly with clean water and allow the cabinets to dry completely. Using a microfiber cloth for cleaning helps to avoid leaving lint residue behind.
Following the degreasing process, a liquid deglosser is applied. Deglossers, also known as surface preparation agents, chemically etch the existing finish, creating a slightly roughened texture that promotes adhesion. This step is crucial for eliminating the slick, glossy surface that would otherwise repel the stain. Apply the deglosser with a clean cloth, ensuring even coverage across all surfaces. Allow the deglosser to dwell for the recommended time, as specified by the manufacturer. Then, wipe away any excess residue with a clean, damp cloth. It is important to wear gloves and eye protection when working with degreasers and deglossers, as they can be irritating to the skin and eyes.
After the deglosser has fully dried, inspect the cabinets for any remaining imperfections, such as chips or scratches. These imperfections can be addressed with wood filler. Apply the wood filler sparingly, following the manufacturer's instructions. Allow the filler to dry completely, and then gently smooth it with fine-grit sandpaper or a sanding sponge. This step is only intended to level the surface and should not be considered a substitute for thorough sanding.
Key Point 2: Selecting the Right Products
Choosing the appropriate stain and primer is essential for achieving a professional-looking and durable finish. Not all stains are created equal, and some are better suited for application over existing finishes than others. Consider using a gel stain, which is thicker than traditional liquid stains and tends to adhere better to non-porous surfaces. Gel stains also offer greater control and are less likely to drip or run, making them a good choice for vertical surfaces like cabinet doors.
The primer is equally important. A bonding primer, specifically designed to adhere to glossy surfaces, is crucial for creating a stable base for the stain. These primers contain additives that promote adhesion and prevent the stain from peeling or chipping over time. Look for a primer that is labeled for use on laminate, melamine, or previously finished surfaces. Apply the primer in thin, even coats, using a high-quality brush or roller. Allow the primer to dry completely, as specified by the manufacturer, before proceeding to the staining step.
Choosing the right color is also an important consideration. If the existing cabinets are a light color, it may be easier to achieve a darker stain. However, if the existing cabinets are dark, it may be necessary to apply multiple coats of stain to achieve the desired color. It is always recommended to test the stain on a small, inconspicuous area of the cabinet before applying it to the entire surface. This will allow you to assess the color and adhesion of the stain and ensure that it meets your expectations.
Consider the type of topcoat to be used to protect the stained surface. Polyurethane is a popular choice for kitchen cabinets because it is durable and resistant to moisture and stains. However, it can yellow over time, especially with lighter stain colors. Water-based polycrylic is a good alternative that provides similar protection without the yellowing effect. Apply the topcoat in thin, even coats, using a high-quality brush or roller. Allow each coat to dry completely before applying the next. Sand lightly between coats with fine-grit sandpaper to create a smooth, even finish.
Key Point 3: Application Techniques for Optimal Results
Proper application techniques are crucial for achieving a professional-looking stain finish without sanding. Start by stirring the stain thoroughly to ensure that the pigments are evenly distributed. Avoid shaking the stain, as this can create air bubbles that can affect the finish. Apply the stain in thin, even coats, using a high-quality brush, foam applicator, or rag. Work in the direction of the wood grain, if applicable, to create a more natural-looking finish.
After applying the stain, allow it to dwell for the recommended time specified by the manufacturer. This will allow the stain to penetrate the surface and achieve the desired color intensity. Then, wipe away any excess stain with a clean, lint-free cloth. This step is crucial for preventing the stain from becoming too dark or blotchy. Be sure to wipe in the direction of the wood grain, if applicable, to avoid leaving streaks.
If a darker color is desired, multiple coats of stain can be applied. However, it is important to allow each coat to dry completely before applying the next. Sand lightly between coats with fine-grit sandpaper to create a smooth, even finish. This will also help the subsequent coats of stain to adhere properly. Remember to wipe away any sanding dust with a tack cloth before applying the next coat of stain.
When staining cabinet doors, it is best to lay them flat on a work surface. This will prevent the stain from dripping or running and ensure even coverage. Use painter's tape to mask off any areas that you do not want to stain, such as the inside of the cabinet doors. Apply the stain to the recessed areas first, using a small brush or foam applicator. Then, apply the stain to the flat surfaces, using a larger brush or roller. Be sure to remove the painter's tape before the stain dries completely to prevent it from peeling off the finish.
After the stain has fully dried, apply a protective topcoat to seal the surface and protect it from scratches, stains, and moisture. Polyurethane and polycrylic are both excellent choices for kitchen cabinets. Apply the topcoat in thin, even coats, using a high-quality brush or roller. Allow each coat to dry completely before applying the next. Sand lightly between coats with fine-grit sandpaper to create a smooth, even finish. Clean the hardware and reattach it to the cabinets once the topcoat has completely cured.
By following these steps and paying close attention to detail, it is possible to successfully stain kitchen cabinets without sanding and achieve a beautiful and durable finish that will enhance the look of the kitchen for years to come.
```
Gel Stain Kitchen Cabinets Without Sanding Fast Easy Diy

Staining Your Wood Cabinets Darker Young House Love

How To Paint Kitchen Cabinets Without Sanding Sustain My Craft Habit

Refurbish Old Cabinets Without Sanding Using Gelstain

How To Paint Kitchen Cabinets Without Sanding Or Priming

Gel Stain Kitchen Cabinets Without Sanding Fast Easy Diy

How To Paint Kitchen Cabinets Without Sanding Or Priming

Pickled Oak Bathroom Vanity Before And After Gel Stain Staining Cabinets Kitchen Makeover Wood

How To Refinish Kitchen Cabinets Without Stripping Ron Hazelton

How To Paint Kitchen Cabinets Without Sanding Sustain My Craft Habit
Related Posts


