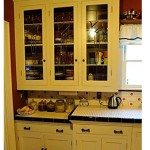
Staining Painted Kitchen Cabinets: Unveiling Essential Considerations
The transformation of painted kitchen cabinets through staining opens up an array of possibilities for rejuvenating your kitchen space. However, achieving a successful outcome hinges on understanding the essential aspects involved in this process. Embarking on this journey requires careful planning and attention to meticulous details to ensure a flawless result. This article delves into these crucial considerations, empowering you with the knowledge to confidently navigate the process of staining painted kitchen cabinets. 1. Cabinet Type and Condition Assessing the material of your kitchen cabinets is paramount. Solid wood cabinets provide the most suitable surface for staining, while laminated or thermofoil cabinets may require additional preparation or may not be suitable candidates for staining. Moreover, the overall condition of the cabinets needs to be evaluated. Damaged or heavily worn cabinets may need repairs or sanding prior to staining. 2. Paint Removal Stripping away the existing paint is a vital step in preparing your kitchen cabinets for staining. Various methods can be employed, including chemical strippers, heat guns, or sanding. The choice of technique depends on the type of paint and the condition of the cabinets. Proper ventilation and safety precautions are imperative during the paint removal process. 3. Sanding Once the paint has been removed, sanding the cabinets provides a smooth surface for the stain to adhere properly. Use progressively finer sandpaper grits to remove any imperfections or remaining paint residue. Sanding also helps open up the wood's pores, allowing the stain to penetrate more effectively. 4. Cleaning Prior to staining, it is essential to thoroughly clean the cabinets to remove any dust, debris, or oils that could interfere with the adhesion of the stain. Use a mild cleaner and a microfiber cloth to gently wipe down the surfaces. Allow the cabinets to dry completely before proceeding to the staining process. 5. Stain Selection Choosing the right stain is crucial in determining the final appearance of your kitchen cabinets. Consider the natural color and grain pattern of the wood, as well as the desired color scheme of your kitchen. Experiment with sample stains on an inconspicuous area to ensure you are satisfied with the outcome before applying it to the entire cabinet. 6. Staining Technique Various staining techniques can be used, including brushing, spraying, or wiping. The choice of technique will depend on the type of stain and the desired finish. Practice the technique on a scrap piece of wood before applying it to the cabinets to achieve even coverage and avoid streaks. 7. Drying and Sealing Allow the stain to dry completely before applying a protective coating. Use a polyurethane or lacquer finish to seal the stained cabinets and protect them from wear and tear. Apply multiple coats, sanding lightly between each coat to ensure a smooth and durable finish.
Painted Vs Stained Cabinets Which Fits Your Style Best

Painted Vs Stained Cabinets Which One To Choose Sir Paints A Lot

Painted Vs Stained Cabinets Jm Kitchen And Bath Design

Staining Kitchen Cabinets Pictures Ideas Tips From

Stained Vs Painted Kitchen Cabinets

Custom Kitchen Cabinets Painted Vs Stained Apico Kitchens

Cabinet Refinishing Guide

Staining Your Wood Cabinets Darker Young House Love

Painted Cabinets Staining Kitchen

Gray Stain Kitchen Cabinet Design
Related Posts


