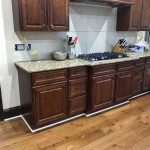
Steps To Painting Kitchen Cabinets White
White kitchen cabinets have become increasingly popular in recent years due to their timeless appeal, ability to brighten up a space, and versatility in complementing various decor styles. If you're looking to upgrade your kitchen with a fresh, modern look, painting your cabinets white is a great option. However, achieving a professional-looking finish requires careful preparation and execution. Here are the essential steps to guide you through the process:
1. Preparation:
Before you start painting, it's crucial to thoroughly prepare your cabinets. This involves:
- Cleaning: Remove all dirt, grease, and grime from the cabinets using a degreaser or TSP cleaner. Wipe them down thoroughly with a clean cloth.
- Sanding: Lightly sand the cabinet surfaces using fine-grit sandpaper (220-grit or higher). This will create a smooth surface for the paint to adhere to.
- Priming: Apply a coat of primer specifically designed for kitchen cabinets. Primer helps block stains and promotes better paint adhesion.
2. Choosing the Right Paint:
For a durable and professional finish, select a high-quality cabinet paint. Look for paints with a semi-gloss or satin finish, which will provide a wipeable and stain-resistant surface. Consider using a paint specifically formulated for kitchen cabinets, as they often contain additives that enhance durability and resistance to moisture and heat.
3. Painting Techniques:
Use a brush for detailed areas, such as edges, corners, and around hardware. Apply multiple thin, even coats of paint, allowing each coat to dry completely before applying the next. Sand lightly between coats to ensure a smooth finish.
For larger surfaces, you can use a roller. Use a high-quality roller with a fine nap to minimize brushstrokes and achieve a smooth application. Work in small sections, rolling the paint in a consistent direction.
4. Drying and Curing:
Allow the paint to dry completely before using the cabinets. Most paints require at least 24 hours to dry to the touch, but it's recommended to wait several days for the paint to fully cure and reach its maximum hardness.
5. Hardware:
Once the paint has cured, reattach the hardware. If you removed the hardware before painting, ensure it is clean and free of paint before reinstalling it.
6. Protection and Maintenance:
To extend the life of your painted cabinets, consider applying a protective sealant. This will create a water-resistant barrier and make the surface easier to clean. Use a sealant specifically formulated for kitchen cabinets, as it will be more resistant to heat and moisture.
Regular cleaning and maintenance will help preserve the finish of your painted cabinets. Wipe them down frequently with a damp cloth and avoid using harsh chemicals or abrasive cleaners.

How To Paint Kitchen Cabinets A Step By Guide Confessions Of Serial Do It Yourselfer

How To Paint Your Kitchen Cabinets In Six Easy Steps The Home Depot

How To Paint Kitchen Cabinets A Step By Guide Confessions Of Serial Do It Yourselfer

Step By Kitchen Cabinet Painting With Annie Sloan Chalk Paint Jeanne Oliver

How To Paint Kitchen Cabinets Like The Pros

How To Paint Oak Cabinets And Hide The Grain Tutorial

7 Step Guide To Painting Kitchen Cabinets

How To Paint Kitchen Cabinets

How To Paint Pressed Wood Kitchen Cabinets Choice Cabinet

5 Basic Steps To Painting Your Kitchen Cabinets Textbook
Related Posts


