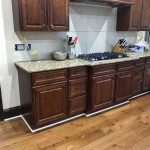
How to Transform Your Kitchen: A Comprehensive Guide to Painting Kitchen Cabinets White
White kitchen cabinets emanate sophistication, cleanliness, and timelessness that can revamp the aesthetics of any kitchen. Painting your cabinets white is a relatively straightforward project that can significantly elevate your kitchen's look. To ensure a professional-looking finish, it is essential to follow a systematic approach and pay meticulous attention to detail.
Materials Required:
- TSP cleaner - Sandpaper (120-grit and 220-grit) - Tack cloth - Paint primer - White cabinet paint - Paintbrush or spray gun - Roller - Screwdriver - Painter's tape - Polyurethane (optional)Step 1: Preparation
Thoroughly clean the cabinets using TSP cleaner to remove grease and dirt. Remove cabinet doors and hardware using a screwdriver. Sand the surfaces with 120-grit sandpaper to create a rough surface for the primer to adhere to. Wipe away dust with a tack cloth.
Step 2: Priming
Apply a thin, even coat of paint primer using a paintbrush or spray gun. Allow the primer to dry completely, approximately 4-6 hours. Lightly sand the primer with 220-grit sandpaper to smooth the surface. Once again, wipe away dust with a tack cloth.
Step 3: Painting the First Coat
Apply a thin coat of white cabinet paint using a paintbrush or roller. Allow the first coat to dry completely, approximately 4-6 hours. Lightly sand the first coat with 220-grit sandpaper to remove any imperfections. Wipe away dust with a tack cloth.
Step 4: Painting the Second Coat
Apply a second coat of white cabinet paint. This coat should be thicker than the first coat, ensuring full coverage. Allow the second coat to dry completely, approximately 4-6 hours. Lightly sand the second coat with 220-grit sandpaper to smooth the surface. Wipe away dust with a tack cloth.
Step 5: Applying Polyurethane (Optional)
For added durability and protection, you may consider applying a clear polyurethane finish. Apply a thin, even coat of polyurethane using a paintbrush or spray gun. Allow the polyurethane to dry completely, approximately 4-6 hours. Lightly sand the polyurethane with 220-grit sandpaper to smooth the surface. Wipe away dust with a tack cloth.
Step 6: Reassembly
Once the paint and polyurethane (if applied) have completely dried, reassemble the cabinet doors and hardware. Reattach the doors to the cabinets and install the hardware securely.
Tips for Success:
- Use high-quality paint and primer specifically designed for kitchen cabinets. - Allow ample drying time between each step to ensure proper adhesion. - Sand lightly between coats to create a smooth and professional-looking finish. - Protect your work surface with drop cloths and wear a dust mask to prevent inhalation of particles. - If you are unsure about any aspect of the process, consult a professional painter for guidance. By following these steps meticulously, you can transform your kitchen cabinets with a fresh, white finish that will create a brighter, more inviting space. Enjoy the satisfaction of a beautifully updated kitchen that reflects your personal style.How To Paint Oak Cabinets And Hide The Grain Tutorial
How To Prep And Paint Kitchen Cabinets Lowe S
How To Paint Maple Kitchen Cabinets Step By Painting Tutorial
How To Paint Oak Cabinets And Hide The Grain Tutorial
Ask Maria Help My White Painted Kitchen Cabinets Look Bad Advice For Homeowners
12 Best Kitchen Colors With White Cabinets 2024 The Paint People
The Best Way To Paint Kitchen Cabinets No Sanding Palette Muse
How To Paint Laminate Kitchen Cabinets Perfect Finish Tips
Update On Our Diy White Painted Kitchen Cabinets 2 Years Later
Top 10 White Paint Colours For Kitchen Cabinets Pamela Lynn Interiors


