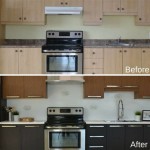
Stripping Kitchen Cabinets DIY: A Step-by-Step Guide
Kitchen cabinets are a focal point in any kitchen, and they can have a significant impact on the overall look and feel of your space. If your cabinets are looking tired and outdated, stripping them down to their original finish can be a great way to give them a fresh new start. While this may seem like a daunting task, it is actually a project that can be easily tackled by DIY enthusiasts. Here's a step-by-step guide to help you strip your kitchen cabinets like a pro:
Step 1: Prepare Your Workspace
Before you begin stripping your cabinets, it's important to prepare your workspace properly. This includes clearing out the cabinets, removing the hardware, and laying down a drop cloth to protect your floors. You'll also need to gather the necessary tools and materials, such as a paint stripper, a scraper, a sanding block, and a vacuum cleaner.
Step 2: Choose the Right Paint Stripper
There are two main types of paint strippers: chemical and non-chemical. Chemical strippers are more effective at removing paint, but they also emit strong fumes and can be harmful to your health. Non-chemical strippers are less effective, but they are also safer to use. If you're unsure which type of stripper to use, consult with a professional at your local hardware store.
Step 3: Apply the Paint Stripper
Once you've chosen a paint stripper, it's time to apply it to the cabinets. Be sure to wear gloves and safety goggles to protect yourself from the chemicals. Apply the stripper liberally to the cabinets, using a paintbrush or a roller. Allow the stripper to sit for the amount of time specified on the product label. During this time, the stripper will break down the paint, making it easier to remove.
Step 4: Scrape Off the Paint
After the stripper has had time to work, it's time to scrape off the paint. Use a scraper to carefully scrape away the paint, working in small sections. Be patient and take your time, as it may take several passes to remove all of the paint. Once you've scraped off as much paint as you can, use a sanding block to smooth out any rough edges.
Step 5: Clean and Sand the Cabinets
Once the paint has been removed, it's important to clean and sand the cabinets before applying a new finish. Use a damp cloth to wipe down the cabinets to remove any residual stripper or paint. Then, use a sanding block to sand the cabinets lightly, removing any imperfections. This will help to create a smooth surface for the new finish.
Step 6: Apply a New Finish
Now that the cabinets are clean and sanded, you can apply a new finish. You can choose from a variety of finishes, including paint, stain, or lacquer. If you're not sure what finish to choose, consult with a professional at your local hardware store. Once you've chosen a finish, follow the instructions on the product label to apply it to the cabinets.
Stripping kitchen cabinets can be a challenging project, but it's also a rewarding one. By following these steps, you can give your cabinets a fresh new look and save money in the process.

How To Refinish Kitchen Cabinets Diy

Diy Staining Oak Cabinets Eclectic Spark

How To Strip Paint Off Kitchen Cabinets And Furniture

Diy Blog Onegirlmanyideas

How To Paint Kitchen Cabinets In 7 Simple Steps

An Easier Way To Remove Paint From Wood

How To Strip Paint Off Kitchen Cabinets And Furniture

Diy Staining Oak Cabinets Eclectic Spark

How To Paint Ugly Oak Strip Cabinetry The Sweetest Digs

How To Make Rustic Kitchen Cabinets By Refinishing Them The Best Stain Color Amanda Katherine
Related Posts


