Updating Old Kitchen Cupboards: A Step-by-Step Guide
Whether your kitchen cupboards are outdated, damaged, or simply in need of a fresh look, updating them can significantly enhance the overall aesthetics and functionality of your kitchen.
This guide will provide you with a step-by-step approach to updating your old kitchen cupboards, including cost-effective options and DIY-friendly tips.
1. Assess and Plan
Before starting any renovations, it's crucial to assess the condition of your existing cupboards and determine your goals for the update. Consider the following:
- Are the cupboards structurally sound?
- Are the doors and drawers in good working order?
- What is the desired style and finish?
- Set a budget and explore cost-saving options.
2. Remove Existing Doors and Hardware
Once you have a plan, remove the doors and drawers from the cupboards. Label them to ensure easy reinstallation. Next, carefully remove any old hardware, such as handles, knobs, and hinges.
3. Refinish or Replace Doors and Drawers
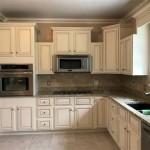
The next step is to determine if you want to refinish the existing doors and drawers or replace them. Refinishing involves sanding, painting, or staining the old surfaces. If you choose to replace them, select new doors and drawers that match your updated style.
4. Update Hardware
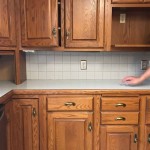
New hardware can instantly transform the look of your cupboards. Consider replacing handles, knobs, and hinges with modern or decorative options that complement the updated finish.
5. Paint or Stain
If you have chosen to refinish your cupboards, carefully sand the surfaces to smooth out any imperfections. Then, apply primer and paint or stain in the desired color or finish. Allow ample drying time before reattaching the doors and drawers.
6. Add Moldings and Trim
Moldings and trim can add depth and character to your updated cupboards. Choose moldings that complement the overall style of your kitchen and install them around the edges of the doors and drawers.
7. Install New Doors and Drawers
Once the refinishing or replacement is complete, it's time to reattach the doors and drawers. Use the labels you created earlier to ensure they are installed in the correct positions.
8. Add Final Touches
The final step is to add any additional touches to complete the updated look of your kitchen cupboards. This could include installing under-cabinet lighting, adding decorative knobs, or displaying artwork or accessories on the shelves.
Conclusion
Updating old kitchen cupboards can be a rewarding project that adds value and style to your home. By following these steps and exploring cost-effective options, you can achieve a beautiful and functional kitchen without breaking the bank.

25 Easy Ways To Update Kitchen Cabinets

Kitchen Update Without Remodeling Birkley Lane Interiors

How To Diy Open Kitchen Shelves From Old Cabinets A Beautiful Budget Update This Life

15 Amazing Ways To Redo Kitchen Cabinets

Our Kitchen Update Phase 1 Painted Cabinets Modern On Monticello

15 Diy Kitchen Cabinet Makeovers Before After Photos Of Cabinets

Updating Old Cabinets How To Get A Modern Look Diva Of Diy

25 Easy Ways To Update Kitchen Cabinets

How To Update Kitchen Cabinet Doors On A Dime My Blessed Life

15 Diy Kitchen Cabinet Makeovers Before After Photos Of Cabinets
Related Posts