Using Gel Stain on Kitchen Cabinets: A Comprehensive Guide
Revitalizing your kitchen cabinets with a fresh coat of stain can dramatically transform the look and feel of your entire space. Gel stains, in particular, offer a unique combination of benefits, making them a popular choice for DIY enthusiasts. Gel stains are thicker than traditional liquid stains, which allows them to adhere better to wood surfaces and provide deeper, richer color saturation. This article delves into the intricacies of using gel stain on kitchen cabinets, outlining key considerations, steps, and essential tips for successful application.
Understanding the Benefits of Gel Stain
Gel stains offer a compelling advantage for kitchen cabinet projects due to their distinct characteristics. They are formulated to provide a smoother, more even application, reducing the risk of streaks, blotches, and uneven color saturation. This is critical for achieving a professional-looking finish. Additionally, gel stains' thicker consistency enables superior adhesion to vertical surfaces, allowing them to cling to the cabinet doors without running or dripping. This makes them ideal for achieving a more consistent and even finish on cabinets, which typically have vertical surfaces.
Gel stains also boast excellent penetration capabilities, allowing them to penetrate deep into the wood grain for a richer and more vibrant color. This contrasts with traditional liquid stains that often sit atop the surface, resulting in a less impactful finish. Moreover, gel stains are less likely to raise wood grain, a common issue with liquid stains, leading to a smoother final product. This makes them a suitable choice for cabinets that have previously been painted or stained.
Preparing for the Staining Process
Prior to applying gel stain, meticulous preparation is paramount to ensure optimal results. The first step involves thoroughly cleaning the cabinets with a mild detergent and water to remove dirt, grease, and grime. A clean surface allows the gel stain to adhere properly and prevents uneven coloration. Next, sand the cabinets using sandpaper with progressively finer grits, starting with coarse grit to remove any imperfections and gradually transitioning to fine grit to create a smooth surface. This step helps to ensure that the gel stain adheres evenly to the wood and produces a smoother finish.
To enhance adherence and prevent bleeding, apply a wood conditioner to the cabinets. This step is essential, particularly for woods like pine and cherry, which have open pores that can readily absorb stain. The conditioner helps to fill in the pores, creating a more uniform surface for the stain to adhere to. This helps to prevent uneven color absorption and bleeding. Additionally, you can use painter's tape to mask areas you wish to protect, such as hardware or surrounding walls. This ensures neat lines and minimizes the risk of accidental staining.
Applying the Gel Stain
Gel stains require a slightly different application approach than liquid stains due to their thicker consistency. Use a foam brush or applicator pad, applying thin, even coats to the cabinets in the direction of the wood grain. Avoid applying too much stain at once, as this can lead to pooling and uneven coverage. Work in small sections to ensure that the stain is applied evenly, and allow each section to dry thoroughly before moving on to the next. If you are using two or more colors, apply the darker color first, followed by the lighter color. Allow the stain to dry completely before applying a top coat.
For a smooth and durable finish, applying a sealant is crucial. A clear polyurethane sealant protects the stained surface from damage, moisture, and wear and tear. Apply several thin coats, allowing each coat to dry completely before applying the next. The number of coats required will depend on the desired level of protection and the type of sealant used. Apply the sealant evenly, using the same technique as you did for the stain. The sealant will also help to enhance the color and depth of the stain, making your kitchen cabinets more vibrant and attractive.
Essential Tips for Success
To achieve professional-looking results when using gel stain on kitchen cabinets, keep these tips in mind:
1. Choosing the Proper Stain
When selecting a gel stain, consider the desired color and the wood's natural characteristics. Gel stains come in a wide range of colors, so you can find the perfect match for your kitchen's aesthetic. Consider testing the stain on a scrap piece of wood to ensure that the color is what you expect. Also, consult the stain manufacturer's instructions to determine the proper application method and drying time for the specific product you choose.
2. Using the Right Tools
Utilize high-quality tools for successful gel stain application. A good quality foam brush or applicator pad can be used to apply the stain evenly. These tools are specifically designed to work with gel stains and will help to ensure a smooth and even application. It is also recommended to use a paintbrush for a more professional finish.
3. Working in a Well-Ventilated Area
Gel stains release fumes that can be harmful to your health. Ensure you are working in a well-ventilated area to prevent inhaling toxic fumes. Wear gloves and eye protection to protect yourself from skin and eye contact. To add extra protection, wear respiratory protection if you are working in a small, enclosed space.
4. Clean Up Immediately
Gel stains can be difficult to remove once they dry, so clean up spills and drips immediately. Use a damp cloth or sponge to clean up any excess stain from tools and surfaces. Be sure to dispose of the cleaning rags properly, as they may be flammable.

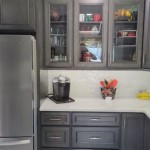
Gel Staining Kitchen Cabinets 6 Month Review Merrypad

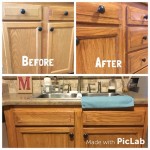
Pickled Oak Bathroom Vanity Before And After Gel Stain Staining Cabinets Kitchen Makeover Wood

Gel Stain Kitchen Cabinets Without Sanding Fast Easy Diy

Java Gel Stain Kitchen Transformation General Finishes Design Center

How To Gel Stain Cabinets She Buys He Builds

Gel Staining Kitchen Cabinets 6 Month Review Merrypad

Gel Stain Cabinets How To Use The Best For Diy Projects

How To Gel Stain Your Cabinets On A Budget Budgeting For Bliss Stained Kitchen

The Creative Cubby Diy Gel Stain Cabinet Makeover

How To Paint Cabinets With Java Gel Stain My Homier Home
Related Posts

