Essential Aspects of Using Milk Paint for Kitchen Cabinets
Transforming kitchen cabinets with milk paint involves meticulous attention to essential aspects that ensure a successful outcome. These aspects, ranging from surface preparation to application techniques, play a crucial role in achieving a durable and aesthetically pleasing finish. This article delves into the key considerations that will guide you through the process of using milk paint effectively.
Surface Preparation: The Foundation for Success
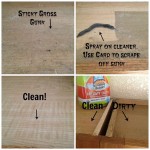
A well-prepared surface is essential for optimal adhesion and a smooth finish. Begin by thoroughly cleaning the cabinets with a degreaser to remove any grease or grime. Sanding the surface lightly creates a slightly rough texture that enhances paint adhesion. Use a fine-grit sandpaper to avoid excessive removal of the existing finish.
Choosing the Right Paint: Pigment and Durability
The choice of milk paint heavily influences the final appearance and longevity of your cabinets. Consider the pigment content, which determines the opacity and richness of the color. Opt for high-quality milk paint with a high pigment concentration for a more vibrant and durable finish.
Application Techniques: Achieving a Smooth Finish
Milk paint is typically applied in thin, even coats. Use a high-density foam brush or a synthetic brush specifically designed for milk paint. Apply the paint in the direction of the wood grain for a smoother finish. Allow each coat to dry completely before applying the next to prevent brush marks.
Sanding and Distress Techniques: Creating a Vintage Look
Once the paint has dried, lightly sanding the surface with fine-grit sandpaper can create a subtle distressed effect. This technique is particularly effective in achieving a vintage or antique look. Alternatively, you can use a wire brush to distress the edges and corners of the cabinets for a more pronounced aged appearance.
Sealing and Protection: Enhancing Durability
To protect your newly painted cabinets and enhance their durability, a clear finish is recommended. Choose a water-based polyurethane or a clear wax that is specifically formulated for milk paint. Apply the sealant with a soft cloth or a brush, ensuring an even and protective coating.
Maintenance and Care: Preserving the Finish
Cleaning and maintaining milk-painted cabinets is relatively straightforward. Regular dusting or wiping with a damp cloth is sufficient for most purposes. Avoid using harsh chemicals or abrasive cleaners, as they can damage the paint finish. For occasional touch-ups, simply apply a thin coat of milk paint over the affected area and seal it with the clear finish.

Diy Painting Our Kitchen Cabinets With White Milk Paint Catz In The

Kitchen Update Choosing A Cabinet Color Monica Benavidez

How To Paint Kitchen Cabinets With General Finishes Milk

An Honest Review Of My Milk Paint Kitchen Cabinets One Year Later

Milk Paint Kitchen Cabinets General Finishes

Diy Painting Our Kitchen Cabinets With White Milk Paint Catz In The

Kitchen Cabinets By Ritter Real Milk Paint

Painting Kitchen Cabinets With General Finishes Milk Paint

Milk Paint Cabinets How To Diy For Under 200 Mama Bear Bliss

Kitchen Cabinets Makeover With Milk Paint Hometalk
Related Posts

