Using Rustoleum Chalk Paint on Kitchen Cabinets: A Transformation Guide
Breathe new life into your kitchen cabinets with Rustoleum Chalk Paint. This transformative paint offers an exceptional finish that evokes a timeless and elegant aesthetic. With its user-friendly application and impressive durability, Rustoleum Chalk Paint empowers DIY enthusiasts to revitalize their kitchen cabinetry, creating a space that reflects their personal style.
Choosing the Right Color and Finish
Rustoleum Chalk Paint presents a splendid array of colors and finishes to accommodate diverse preferences. Whether you seek a classic white, a bold navy, or a subtle gray, the palette offers a shade to complement any kitchen design. For a distressed look, select a dark color and apply a lighter hue over it, allowing some of the base color to peek through.
Preparation: Cleaning and Sanding
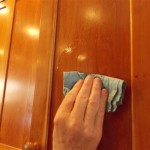
Thoroughly cleanse the cabinet surfaces with a degreaser to eliminate grease and grime. Ensure the cabinets are completely dry before proceeding. For a smoother finish, lightly sand the surfaces with fine-grit sandpaper, focusing on areas where the paint may chip, such as edges and corners. Removing dirt and debris promotes optimal paint adhesion.
Applying Rustoleum Chalk Paint
Stir the paint thoroughly before commencing application. Apply thin, even strokes using a brush or roller specifically designed for chalk paint. Allow each coat to dry completely before applying the next. The number of coats required depends on the desired coverage and opacity. For a deeper, more vibrant color, apply multiple thin coats.
Distressing (Optional)
To achieve a distressed or antiqued look, lightly sand certain areas of the painted surface after the final coat has dried. Focus on edges, corners, and areas where natural wear would occur. This technique exposes the undercoat, creating a charming, timeworn appearance.
Sealing and Protecting
Once the paint has fully cured, protect the cabinetry with a clear sealant. Rustoleum offers a specialized Chalked Protective Topcoat that complements their Chalk Paint, providing a durable finish that resists chipping, peeling, and yellowing. Apply the topcoat in thin, even strokes and allow it to dry completely.
Additional Tips
- Use a primer on raw wood or previously painted surfaces to enhance paint adhesion.
- Allow ample drying time between coats to prevent cracking or peeling.
- Sand lightly between coats to remove any raised fibers or imperfections.
- Apply clear wax for added durability and a lustrous finish.
- Clean brushes thoroughly with soap and water immediately after use.
Conclusion
Updating kitchen cabinets with Rustoleum Chalk Paint is a rewarding endeavor that transforms the heart of your home. By following these guidelines and embracing your creativity, you can revitalize your kitchen cabinetry, creating a space that reflects your personal style and enhances the overall ambiance of your home.

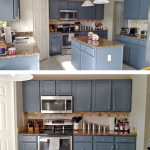
Chalk Painted Kitchen Cabinets 2 Years Later Our Storied Home

Chalk Painted Kitchen Cabinets 2 Years Later Our Storied Home

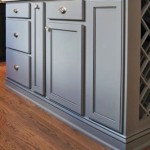
Aged Gray Rustoleum Chalk Paint Cupboards Kitchen Grey Painted Cabinets

Chalk Painted Kitchen Cabinets 2 Years Later Our Storied Home

Painting Kitchen Cabinets With Chalk Paint The Kelly Homestead

Painting Kitchen Cabinets With Chalk Paint The Kelly Homestead

Rustoleum Chalk Paint Charcoal Over Stained Cabinets No Primer Just And Sand Love This Kitchen Buy

Why I Repainted My Chalk Painted Cabinets Sincerely Sara D Home Decor Diy Projects

100 Small Kitchen Cabinet Transformation Rustoleum Chalk Paint

Oak Vanity Update With Rustoleum Chalk Paint Glaze Review
Related Posts

