Vinyl Wallpaper: A Practical and Stylish Solution for Kitchen Cabinets
Kitchen remodeling can be a significant undertaking, often involving substantial costs and significant disruption to daily life. Many homeowners seek cost-effective and less invasive alternatives to completely replacing kitchen cabinets. Vinyl wallpaper presents a viable option for updating the appearance of kitchen cabinets without the extensive labor and expense associated with traditional renovation methods.
Vinyl wallpaper is a type of wall covering composed of a paper or fabric backing coated with a layer of vinyl plastic. Its durability, water resistance, and ease of cleaning make it particularly suitable for kitchen environments, where cabinets are frequently exposed to moisture, grease, and general wear and tear. Furthermore, the wide range of patterns, colors, and textures available in vinyl wallpaper allows for considerable design flexibility, enabling homeowners to achieve a variety of aesthetic styles.
Key Advantages of Using Vinyl Wallpaper on Kitchen Cabinets
The application of vinyl wallpaper to kitchen cabinets offers a multitude of benefits that appeal to budget-conscious homeowners seeking to refresh their kitchen space. These advantages extend beyond mere aesthetics, encompassing practical considerations such as cost-effectiveness, ease of installation, and long-term maintenance.
Cost-Effectiveness: Replacing kitchen cabinets is a costly endeavor, often representing a significant portion of a kitchen renovation budget. Vinyl wallpaper offers a significantly more affordable alternative. The cost of vinyl wallpaper is considerably lower than the price of new cabinets or even professional cabinet painting services. This allows homeowners to achieve a refreshed look without incurring substantial financial burden. Saving money on cabinet replacement frees up resources for other kitchen upgrades, such as new countertops, appliances, or backsplashes.
Ease of Installation: Applying vinyl wallpaper to kitchen cabinets is a relatively straightforward process that can be undertaken by homeowners with basic DIY skills. Unlike cabinet replacement, which often requires professional installation, wallpaper application can be completed without the need for specialized tools or extensive expertise. The process typically involves cleaning the cabinet surfaces, measuring and cutting the wallpaper, applying adhesive, and smoothing out any air bubbles. Online tutorials and instructional videos provide readily available guidance for those new to wallpaper application. The ease of installation translates to time savings and minimizes disruption to the household.
Variety and Design Flexibility: Vinyl wallpaper is available in a vast array of patterns, colors, and textures, offering homeowners unparalleled design flexibility. From classic wood grain finishes to contemporary geometric patterns, the options are virtually limitless. This allows homeowners to customize the look of their kitchen cabinets to match their personal style and existing décor. The diverse selection of vinyl wallpaper also makes it possible to mimic the appearance of more expensive materials, such as wood, stone, or metal, at a fraction of the cost. This versatility empowers homeowners to create a unique and personalized kitchen space without breaking the bank.
Preparing Kitchen Cabinets for Vinyl Wallpaper Application
Proper preparation is crucial for ensuring the successful and long-lasting application of vinyl wallpaper to kitchen cabinets. Thoroughly cleaning and priming the cabinet surfaces will promote adhesion and prevent the wallpaper from peeling or bubbling over time. Neglecting these preparatory steps can compromise the final result and lead to premature failure of the wallpaper.
Cleaning: The first step in preparing kitchen cabinets for vinyl wallpaper is to thoroughly clean the surfaces. This involves removing any grease, dirt, or grime that may have accumulated over time. A mild detergent solution and a soft cloth are typically sufficient for cleaning most cabinet surfaces. For stubborn grease stains, a degreasing cleaner may be necessary. It is essential to rinse the cabinets thoroughly with clean water and allow them to dry completely before proceeding to the next step. Cleaning ensures that the adhesive will bond properly to the cabinet surface, preventing the wallpaper from lifting or peeling.
Sanding (if necessary): If the kitchen cabinets have a glossy or uneven surface, light sanding may be required to create a better surface for the wallpaper adhesive to grip. Use fine-grit sandpaper to gently roughen the surface of the cabinets. Be careful not to sand too aggressively, as this could damage the underlying material. After sanding, wipe the cabinets clean with a damp cloth to remove any sanding dust. Sanding promotes adhesion and helps to create a smooth, even surface for the wallpaper.
Priming: Priming is an essential step in preparing kitchen cabinets for vinyl wallpaper. Primer creates a barrier between the cabinet surface and the wallpaper adhesive, preventing the adhesive from being absorbed into the cabinet material. This ensures a strong and long-lasting bond. Choose a primer that is specifically designed for use with vinyl wallpaper. Apply the primer evenly to the cabinet surfaces using a brush or roller. Allow the primer to dry completely according to the manufacturer's instructions before proceeding with wallpaper application. Priming not only improves adhesion but also helps to conceal any imperfections in the cabinet surface.
Applying Vinyl Wallpaper to Kitchen Cabinets: A Step-by-Step Guide
The application of vinyl wallpaper to kitchen cabinets requires careful attention to detail and a methodical approach. Following these steps will help to ensure a professional-looking result and prevent common problems such as air bubbles, misaligned seams, and uneven edges.
Measuring and Cutting: Begin by accurately measuring the dimensions of each cabinet surface that will be covered with wallpaper. Add a few extra inches to each dimension to allow for trimming and adjustments. Use a sharp utility knife or rotary cutter to cut the wallpaper to the desired size. It is essential to cut the wallpaper precisely to avoid gaps or overlaps when applying it to the cabinets. A cutting mat and straight edge can be helpful for achieving accurate cuts.
Applying Adhesive: Most vinyl wallpaper requires the application of a wallpaper adhesive to the back. Follow the manufacturer's instructions for preparing the adhesive. Apply the adhesive evenly to the back of the wallpaper using a brush or roller. Be sure to cover the entire surface of the wallpaper, paying particular attention to the edges. Allow the adhesive to soak for the recommended amount of time before applying the wallpaper to the cabinet. This soaking period allows the adhesive to activate and ensures a strong bond.
Smoothing and Aligning: Carefully align the wallpaper with the edge of the cabinet surface. Gently press the wallpaper onto the cabinet, starting from one edge and working your way across. Use a wallpaper smoothing tool or a soft cloth to smooth out any air bubbles or wrinkles. Work from the center of the wallpaper outwards to prevent air from being trapped underneath. Pay close attention to the seams, ensuring that they are properly aligned and tightly sealed. Use a seam roller to press the seams firmly together.
Trimming Excess Wallpaper: Once the wallpaper has been applied and smoothed, use a sharp utility knife to trim any excess wallpaper around the edges of the cabinet. Run the knife along the edge of the cabinet to create a clean, precise cut. Be careful not to damage the cabinet surface while trimming. A metal ruler or straight edge can be used as a guide for the knife. After trimming, use a damp cloth to wipe away any excess adhesive. Allow the wallpaper to dry completely before using the cabinets.
Addressing Corners and Edges: Corners and edges often present a challenge when applying vinyl wallpaper. To achieve a clean and professional look, carefully measure and cut the wallpaper to fit around the corners and edges. Use a sharp utility knife to make precise cuts and folds. Consider using corner protectors or edge banding to conceal any raw edges and provide added durability. A heat gun can be used to soften the vinyl wallpaper and make it easier to mold around corners and edges.
Maintaining Vinyl Wallpaper on Kitchen Cabinets
Regular cleaning and maintenance are essential for preserving the appearance and longevity of vinyl wallpaper on kitchen cabinets. Simple cleaning practices will prevent the build-up of dirt, grease, and grime, while prompt attention to any damage will prevent it from escalating.
Regular Cleaning: Clean vinyl wallpaper on kitchen cabinets regularly with a mild detergent solution and a soft cloth. Avoid using abrasive cleaners or scouring pads, as these can damage the surface of the wallpaper. Pay particular attention to areas that are prone to grease and splatters, such as around the stove and sink. Wipe the cabinets clean with a damp cloth and dry them thoroughly. Regular cleaning will help to prevent stains and maintain the wallpaper's appearance.
Spot Cleaning: For stubborn stains, use a spot cleaner that is specifically designed for use on vinyl wallpaper. Test the cleaner in an inconspicuous area first to ensure that it does not damage the wallpaper. Apply the cleaner to a soft cloth and gently rub the stain. Avoid using harsh chemicals or solvents, as these can discolor or damage the wallpaper. Rinse the area with clean water and dry it thoroughly.
Repairing Damage: If the vinyl wallpaper becomes damaged, such as from tears or scratches, it can often be repaired. Small tears can be patched with a piece of matching wallpaper. Cut the patch slightly larger than the tear and apply it to the damaged area using wallpaper adhesive. Smooth out any air bubbles or wrinkles. For larger areas of damage, it may be necessary to replace the entire section of wallpaper. Carefully remove the damaged wallpaper and apply a new piece, following the instructions outlined above.

6m Vinyl Oil Proof Marble Wallpaper For Kitchen Countertop Cabinet Shelf Pvc Self Adhesive Waterproof Contact Paper Bathroom Fruugo Tr

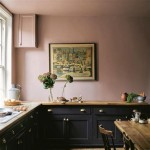
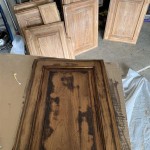
Wallpaper Cabinets For Kitchen

Glossy White Wallpaper Cabinet Sticker Vinyl L And Stick Temu

Marble Wallpaper Self Adhesive 60 X 500 Cm Renovation Kitchen Cabinets Lmirah Tabletop Etc

Self Adhesive Wallpaper Waterproof Wood Vinyl Roll Contact Paper Doors Cabinet

Waterproof Pvc Vinyl Solid Color Green Self Adhesive Wallpaper Kitchen Wardrobe Cabinet Furniture Renovation Door Wall Stickers China Made In Com

Kitchen And Bathroom Splashback Removable Vinyl Wallpaper Wall Decor Design

Glossy Pearl Green Pvc Self Adhesive Wallpaper Modern Diy Home Decor Vinyl Stickers S For Kitchen Cabinet Waterproof China Glitter Made In Com

Countertop Kitchen Cabinet Furniture Renovation Pvc Self Adhesive Premium Pearlized Home Decor Vinyl Stickers Wallpaper Wall Decal Black Com

1 Roll Matte Cabinet Kitchen Decoration Waterproof Solid Color Self Adhesive Thickened Vinyl Wallpaper Bedroom Home Decor Wall Sticker Shein
Related Posts