What Kind of Primer Should You Use on Kitchen Cabinets?
Refinishing kitchen cabinets is a cost-effective method for updating the look of a kitchen without the expense of a complete remodel. A critical step in this process is the application of primer. The primer acts as a foundational layer that promotes adhesion of the topcoat, seals the existing cabinet surface, and can block stains and prevent bleed-through. Selecting the appropriate primer is paramount for achieving a durable, professional-looking finish. Several factors influence this selection, including the existing cabinet material, the desired finish, and the type of paint being used.
The existing finish on the cabinets plays a crucial role. Cabinets previously painted with oil-based paints may require a different primer than those finished with laminate or bare wood. Similarly, the type of wood affects primer selection; porous woods like oak may need a primer with enhanced sealing properties. Failure to choose the correct primer can lead to paint failure, including peeling, cracking, and uneven color distribution.
This article will examine the various types of primers available for kitchen cabinets, the factors influencing their selection, and best practices for application. Understanding these aspects will aid in achieving a professional and long-lasting finish on kitchen cabinets.
Identifying Cabinet Material and Existing Finish
Before selecting a primer, it’s essential to accurately identify the material of the kitchen cabinets and the existing finish. Common cabinet materials include solid wood (oak, maple, cherry), wood veneer, MDF (medium-density fiberboard), and laminate. Each material possesses unique properties that impact primer adhesion and performance. Similarly, the existing finish could be paint (oil-based or latex), stain, varnish, or a factory-applied coating.
Solid wood cabinets, particularly those made from porous woods like oak, often benefit from primers with excellent sealing properties. These primers help to prevent the wood from absorbing excessive amounts of paint, which can lead to an uneven finish and increased paint consumption. Knotty woods may also require a specialized primer designed to block tannins and prevent them from bleeding through the topcoat. Maple and cherry, being denser hardwoods, may require less aggressive primers, but proper surface preparation is still essential for optimal adhesion.
Wood veneer cabinets consist of a thin layer of real wood adhered to a substrate like particleboard or MDF. While they offer the aesthetic of solid wood, the veneer itself can be delicate. When preparing veneer cabinets for painting, it's crucial to avoid aggressive sanding that could damage or remove the veneer layer. Primers formulated for adhesion to smooth or slightly glossy surfaces are often suitable for veneer cabinets.
MDF cabinets are a popular choice due to their stability and smooth surface. However, MDF is highly absorbent and can swell if exposed to excessive moisture. Priming MDF cabinets with a moisture-resistant primer is essential to prevent damage and ensure a lasting finish. Look for primers specifically formulated for use on MDF or that are labeled as moisture-resistant.
Laminate cabinets present a unique challenge because laminate is a non-porous material with minimal surface texture. Special adhesion-promoting primers are necessary for painting laminate cabinets. These primers contain additives that create a mechanical bond between the laminate surface and the paint, preventing peeling and chipping.
Determining the existing finish is equally important. To identify an oil-based paint, a simple test can be performed using a cotton ball soaked in denatured alcohol. If the paint softens or dissolves when rubbed with the alcohol, it is likely latex-based. If the paint remains unaffected, it is likely oil-based. Applying latex paint over an oil-based finish without proper preparation can lead to adhesion problems. In such cases, a bonding primer or thorough sanding is necessary.
Types of Primers for Kitchen Cabinets
Several types of primers are commonly used for kitchen cabinets, each with specific characteristics and advantages. The most prevalent types include latex primers, oil-based primers, shellac-based primers, and specialty primers designed for specific surfaces or problems.
Latex primers are water-based and offer several advantages, including low odor, easy cleanup, and good flexibility. They are generally suitable for priming previously painted latex surfaces and bare wood. Latex primers are also less prone to cracking and chipping compared to oil-based primers. However, they may not be as effective at blocking stains or sealing porous surfaces as other types of primers. They are a good choice for MDF cabinets as they are less likely to cause the wood to swell than some other primers.
Oil-based primers provide excellent adhesion, stain blocking, and sealing properties. They are particularly effective for priming bare wood, cabinets with existing oil-based finishes, and cabinets with stains or odors. Oil-based primers also offer superior leveling, resulting in a smoother finish. However, they have a strong odor, require mineral spirits for cleanup, and can be more brittle than latex primers. They also take longer to dry and cure.
Shellac-based primers are known for their exceptional stain-blocking capabilities. They are highly effective at sealing knots, water stains, smoke damage, and other difficult-to-cover blemishes. Shellac primers also adhere well to a variety of surfaces, including wood, metal, and glass. They dry very quickly and can be recoated in a short amount of time. However, shellac primers have a strong odor, require denatured alcohol for cleanup, and are more brittle than latex or oil-based primers.
Specialty primers are designed for specific applications or problem areas. Adhesion-promoting primers are formulated to bond to smooth, non-porous surfaces like laminate and melamine. Stain-blocking primers are specifically designed to prevent stains from bleeding through the topcoat. Self-etching primers are used on metal surfaces to improve adhesion and prevent corrosion. These specialty primers can be indispensable for achieving a successful finish on challenging surfaces.
Consider tinting the primer towards the final color of the paint. This can reduce the number of paint coats required, saving both time and material. A gray-tinted primer is often used under darker colors to improve coverage. A white or off-white primer is usually used under lighter colors.
Application Techniques and Best Practices
Proper application techniques are essential for achieving a professional and durable finish on kitchen cabinets. Surface preparation, primer application, and sanding are critical steps that influence the final outcome. Investing time and effort in these steps will yield a superior result.
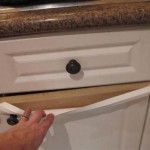
Thorough surface preparation is paramount. Begin by removing all hardware, such as knobs, pulls, and hinges. Clean the cabinets thoroughly with a degreaser to remove any grease, grime, or dirt. Rinse the cabinets with clean water and allow them to dry completely. Depending on the existing finish, sanding may be necessary.
For glossy or smooth surfaces, sanding is crucial to create a mechanical bond for the primer. Use a medium-grit sandpaper (120-180 grit) to scuff the surface lightly. Avoid aggressive sanding that could damage the cabinet material. After sanding, remove the sanding dust with a tack cloth or a vacuum with a brush attachment. For cabinets with peeling or damaged paint, scrape away any loose material and sand the area smooth.
Apply the primer in thin, even coats using a high-quality brush, roller, or sprayer. If using a brush, choose a brush with synthetic bristles for latex primers and a brush with natural bristles for oil-based primers. For rollers, use a foam roller or a short-nap roller to minimize stippling. When using a sprayer, follow the manufacturer's instructions for thinning and application settings.
Allow the primer to dry completely according to the manufacturer's instructions. Drying times can vary depending on the type of primer, the temperature, and the humidity. Avoid rushing the drying process, as this can lead to adhesion problems. Once the primer is dry, inspect the surface for any imperfections. Small imperfections can be sanded smooth with fine-grit sandpaper (220-320 grit). Remove the sanding dust before applying the topcoat.
For optimal results, apply two coats of primer, especially when priming bare wood or cabinets with stains. Follow the same application techniques for each coat, ensuring that each coat is completely dry before applying the next. Using a high-quality primer and applying it correctly will significantly improve the adhesion, durability, and appearance of the finished kitchen cabinets.
Consider using a paint conditioner to improve the flow and leveling of the primer, especially when brushing or rolling. Paint conditioners can help reduce brush marks and roller stipple, resulting in a smoother finish. Also consider the volatile organic compound (VOC) content of the primer, opting for low-VOC or zero-VOC options to minimize odors and environmental impact, especially in enclosed spaces like kitchens.

1 Best Primer For Kitchen Cabinets Guranteed To Stick

Best Primers Paints For Cabinets Furniture Fireplaces The Striped House

How To Paint Kitchen Cabinets A Step By Guide Confessions Of Serial Do It Yourselfer

What Is The Best Primer To Use When Painting Kitchen Cabinets Quora

How Many Coats Of Primer Do I Need To Paint Kitchen Cabinets Quora

How To Paint Kitchen Cabinets A Step By Guide Confessions Of Serial Do It Yourselfer

1 Best Primer For Kitchen Cabinets Guranteed To Stick

How To Paint Kitchen Cabinets A Step By Guide Confessions Of Serial Do It Yourselfer

What Is The Best Primer For Kitchen Cabinets Jim Handyman

How To Prime Cabinets For A Smooth Finish The Turquoise Home
Related Posts