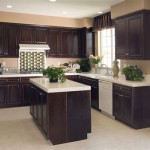
Whitewashing Kitchen Cabinets: A Timeless Transformation
Transforming your kitchen cabinets with a fresh coat of whitewash can revitalize your space, infusing it with a charming and rustic aesthetic. Whitewashing, a centuries-old technique, involves applying a thin layer of diluted paint or limewash to create a soft, aged appearance. This treatment not only enhances the beauty of your cabinets but also protects them from wear and tear.
Benefits of Whitewashing Kitchen Cabinets
Whitewashing kitchen cabinets offers numerous advantages:
- Timeless Appeal: Whitewash exudes an enduring charm that complements various design styles, from farmhouse to coastal.
- Versatility: Whitewash can be applied to different wood species, from oak to maple, creating unique variations in texture and tone.
- Easy Maintenance: Whitewashing seals cabinets, making them less prone to staining and scratches. Regular cleaning with a damp cloth is sufficient for maintenance.
Essential Materials for Whitewashing
Gather the following materials before commencing the project:
- White primer
- White latex paint or limewash
- Water
- Roller brush
- Paint brush
- Sandpaper
- Tack cloth
Step-by-Step Guide to Whitewashing Kitchen Cabinets
Follow these steps for a successful whitewashing treatment:
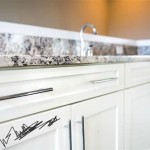
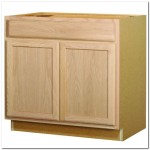
- Prepare the Cabinets: Remove cabinet doors and hardware. Sand surfaces lightly to remove any imperfections. Wipe down with a tack cloth to remove dust.
- Apply Primer: Apply a coat of white primer to the cabinets. This step ensures a uniform base for the whitewash.
- Mix Whitewash Solution: In a separate container, combine white latex paint or limewash with water. The ratio depends on the desired opacity; a 1:1 ratio is a good starting point.
- Apply Whitewash: Using a roller brush, apply the whitewash solution in thin, even strokes. Work in sections to prevent streaks.
- Sand for Texture: Once the whitewash has dried, lightly sand the surface to create a distressed look. Focus on edges and raised areas.
- Finish: If desired, apply a clear polyurethane finish to protect the whitewashed surface. Allow ample time to dry.
Tips for Achieving Perfect Whitewash
- Use a dry brush for a more subtle whitewash effect.
- Apply multiple thin coats rather than one thick coat.
- Test the whitewash solution on an inconspicuous area before applying it to the entire cabinet.
- Allow sufficient drying time between coats.
Conclusion
Whitewashing kitchen cabinets is a rewarding DIY project that can elevate your kitchen's aesthetic. By following these guidelines and using quality materials, you can achieve a stunning, timeless look that will enhance your home for years to come.

Whitewashed Kitchen Cabinets Finishes Ashley Spencer

Whitewashed Kitchen Cabinets Finishes Ashley Spencer

Whitewashed Kitchen Cabinets Finishes Ashley Spencer

Whitewashed Kitchen Cabinets Finishes Ashley Spencer

Behr Premium 1 Gal Ppu24 12 Whitewash Oak Satin Enamel Interior Exterior Cabinet Door Trim Paint 752001 The Home Depot

Whitewashed Kitchen Cabinets Finishes Ashley Spencer

How To Lighten Stained Wood 7 Options That Work Grace In My Space

Antique Kitchens Pictures And Design Ideas White Kitchen Cabinets Distressed

Whitewashed Kitchen Cabinets Finishes Ashley Spencer

How To Whitewash Cabinets Doityourself Com