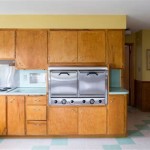
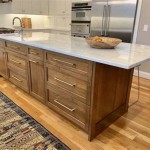
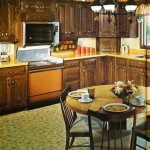
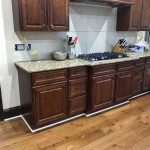
How To Clean Cabinet Doors Before Painting
Painting cabinet doors can be a transformative project, giving your kitchen or bathroom a fresh, updated look. However, achieving a flawless finish starts with proper preparation. One crucial step is thoroughly cleaning the cabinet doors to ensure the paint adheres properly and lasts. This article outlines the essential steps to effectively clean cabinet doors before painting, ensuring a smooth, long-lasting finish.
Removing Dust and Debris
The first step in cleaning cabinet doors is to get rid of loose debris. This includes dust, cobwebs, and any food particles that may be clinging to the surface. Start by dusting the doors with a dry microfiber cloth or a soft-bristled brush. This will remove the majority of the loose debris. For areas that are difficult to reach, a vacuum with a crevice tool may be helpful.
Once the initial dusting is completed, use a damp cloth to wipe down the cabinet doors again. Ensure the cloth is only slightly damp, as excessive moisture can damage the wood and make the paint difficult to adhere. When wiping, use gentle, circular motions to remove any remaining dust, dirt, or grime. Be sure to pay attention to the edges, corners, and grooves, as these areas often accumulate more dirt.
Tackling Grease and Oil
Kitchen cabinets, especially those near the stove or sink, are prone to grease and oil buildup. These substances can interfere with paint adhesion, leading to a patchy and uneven finish. To remove grease, use a solution of warm, soapy water with a mild dish soap. Apply the solution to a clean cloth and gently rub it over the cabinet doors, paying particular attention to areas with visible grease stains. For stubborn stains, consider using a grease-cutting cleaner specifically designed for kitchen surfaces.
After cleaning with soapy water, rinse the cabinet doors thoroughly with clean water to remove any soap residue. Allow the doors to dry completely before proceeding to the next step. If you plan to use a primer, it is essential to ensure that the cabinet doors are completely dry before applying it, as moisture can prevent the primer from adhering properly.
Removing Old Paint and Finish
If your cabinet doors have previously been painted or have a protective finish, it is crucial to remove these layers before painting. Old paint can prevent the new paint from adhering properly, leading to peeling and chipping. Similarly, a protective finish can create a barrier that prevents the paint from bonding with the wood.
For removing paint, there are multiple options:
- Sanding: Sanding is a common method for removing old paint, but it can be time-consuming and require significant effort. Choose sandpaper with a grit appropriate for the thickness of the paint, and use a sanding block to ensure even pressure. Begin with a coarser grit to remove most of the old paint and gradually progress to a finer grit for a smooth finish.
- Chemical Stripper: Chemical paint strippers are available in liquid or gel form and can be more effective than sanding, especially for thick layers of paint. However, these strippers can be harmful if not used cautiously. Wear protective gloves and eye protection when handling chemical strippers and follow the manufacturer's instructions carefully. Ensure adequate ventilation during the process.
- Heat Gun: A heat gun can be used to soften and remove old paint. However, this method requires caution as the heat can damage the wood if not used properly. Apply the heat gun to the paint until it begins to blister, then scrape it off with a putty knife. Be sure to wear protective gear and work in a well-ventilated area
Once you have removed the old paint or finish, thoroughly clean the cabinet doors to remove any residue. This can be done with a damp cloth and a mild detergent. Allow the doors to dry completely before proceeding to the next prepping step.
Priming the Cabinet Doors
Priming the cabinet doors before painting is essential for achieving a smooth, durable finish. Primer provides a bonding layer between the wood and the paint, improving adhesion and preventing the paint from absorbing into the wood. It also helps to create a uniform surface for the paint, minimizing the appearance of imperfections.
Choose a primer that is compatible with the type of paint you intend to use. For example, if you are using oil-based paint, you should use an oil-based primer. Apply the primer using a brush, roller, or spray gun, following the manufacturer's instructions. Allow the primer to dry completely before proceeding to the painting stage.
Final Cleaning
Before painting, it is crucial to give the cabinet doors one final cleaning. This will remove any dust or debris that may have settled on the surface after cleaning and priming. Use a tack cloth or a slightly damp cloth to wipe down the doors, ensuring that they are free of any particles.
This final step is essential for achieving a smooth, even paint finish. Any dust or debris remaining on the surface can become trapped under the paint, creating imperfections and detracting from the overall appearance.

How To Clean Cabinets For Painting Cleaning Sanding Priming

Diy Kitchen Cabinet Painting The Easy Way

A Step By Guide To Painting Kitchen Cabinets With Kilz Primer Blog

How To Prep Cabinets For An Amazing Paint Finish

Why You Should Remove Your Cabinet Doors Before Painting

How To Clean A Extra Dirty Oak Kitchen Cabinet Door Before Painting In Strongsville Ohio

How To Paint Cabinets Like A Pro Jenna Sue Design

Update Kitchen Cabinets No Sanding

How To Paint Kitchen Cabinets Like An Expert In 9 Steps Benjamin Moore

How To Paint Kitchen Cabinets The Easy Way