How to Fix Veneer on Kitchen Cabinets
Essential aspects of fixing veneer on kitchen cabinets include identifying the type of veneer, the extent of the damage, and the appropriate repair technique. Understanding these factors ensures a successful and durable repair. This article will provide a comprehensive guide to fixing veneer on kitchen cabinets, covering each essential aspect in detail.Identifying the Type of Veneer
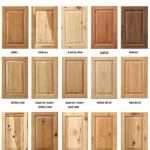
Veneer comes in various types, including natural wood, laminate, and thermofoil. Determining the type of veneer on your cabinets is crucial as it affects the repair method and materials used. Natural wood veneer, for example, requires different adhesives and techniques compared to laminate or thermofoil.Assessing the Extent of Damage
The extent of the damage dictates the repair approach. Minor scratches or dents can be easily fixed using touch-up markers or wax sticks. More significant damage, such as chips, cracks, or peeling, may require more extensive repairs involving patching or replacing the damaged veneer.Choosing the Appropriate Repair Technique
The suitable repair technique depends on the type of veneer and the extent of damage. For minor scratches and dents, touch-up markers or wax sticks can effectively conceal the imperfections. For chips and cracks, patching with matching veneer or wood filler may be necessary. Extensive peeling veneer may require replacing the entire affected area.Preparing the Damaged Area
Before applying any repair materials, it's essential to prepare the damaged area by cleaning it thoroughly using a damp cloth or mild detergent. Remove any dirt, grease, or debris that may interfere with the adhesion of the repair material. Sanding the damaged area may also be necessary to create a smooth surface for bonding.Applying the Repair Material
Once the damaged area is prepared, apply the appropriate repair material according to the manufacturer's instructions. For touch-ups, apply the marker or wax stick directly to the damaged area and blend it in. For patching, cut a piece of veneer or wood filler to match the damaged area and secure it with adhesive. For replacement, carefully remove the damaged veneer and install the new one.Finishing the Repair
After applying the repair material, allow it to dry or cure completely. Once dry, sand the repaired area to smooth out any rough edges and create a uniform finish. If necessary, apply a clear sealant or varnish to protect the repair and enhance its durability. With proper care and maintenance, the repaired veneer can restore the beauty and functionality of your kitchen cabinets.
How To Reface Kitchen Cabinets With Veneer

How To Repair Warped Cabinet Veneer Ifixit Guide

How To Repair Warped Cabinet Veneer Ifixit Guide

How To Paint Veneer Cabinets For A Long Lasting Finish Anika S Diy Life

Refinishing Kitchen Cabinets Modern Refacing Made Easy Wisewood

How To Fix Holes In Veneer On Kitchen Cabinets Doityourself Com Community Forums

Restoring A Cocktail Cabinet Veneer Repair

Cabinet Refacing How To Reface Kitchen Cabinets Diy

How To Repair Warped Cabinet Veneer Ifixit Guide

How To Repair Ling Veneer On Particle Board Cabinets Handhills
Related Posts