How To Paint Wash Kitchen Cabinets: A Comprehensive Guide
Paint washing kitchen cabinets is a technique used to create a textured, weathered appearance, offering an alternative to solid, uniform cabinet finishes. This method involves applying diluted paint over a base coat and then selectively removing some of the wet paint to reveal the underlying color. The result is a subtly aged and nuanced aesthetic suitable for various kitchen styles, from farmhouse to coastal.
This article provides a detailed, step-by-step guide on how to successfully paint wash kitchen cabinets, encompassing surface preparation, material selection, proper application techniques, and essential safety considerations. The goal is to equip individuals with the knowledge to achieve a professional-looking paint wash finish that enhances the overall visual appeal of their kitchen.
Key Point 1: Preparation is Paramount
Achieving a successful paint wash finish hinges on meticulous preparation. Neglecting this stage can lead to adhesion problems, uneven application, and an overall inferior outcome. This section outlines the essential preparatory steps.
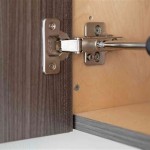
1. Disassembly: Begin by removing all cabinet doors and drawers. This allows for easier access to all surfaces and prevents paint drips or runs in hard-to-reach areas. Remove any hardware, such as knobs, pulls, and hinges. Store these components in a clearly labeled container to ensure easy reassembly.
2. Cleaning: Thoroughly clean all cabinet surfaces to remove grease, grime, and any existing coatings. Use a degreasing cleaner specifically formulated for kitchen cabinets. Follow the manufacturer's instructions carefully. Rinse the surfaces with clean water and allow them to dry completely.
3. Sanding: Sanding smooths the surface, creates better adhesion for the primer and paint, and removes any existing glossy finishes. Use a medium-grit sandpaper (120-180 grit) to lightly sand all surfaces. Focus on removing the sheen without stripping off the existing finish entirely. For heavily varnished or lacquered cabinets, a coarser grit (80-100 grit) may be necessary initially. After sanding, wipe down the surfaces with a tack cloth to remove all sanding dust.
4. Priming: Apply a high-quality primer to all surfaces. The primer serves several crucial functions: it seals the wood, provides a uniform surface for the paint to adhere to, and prevents tannin bleed-through (especially important for cabinets made of oak or cherry). Choose a primer specifically designed for cabinets or furniture. Apply the primer in thin, even coats, following the manufacturer’s recommendations regarding drying time. Depending on the cabinet material and the existing finish, two coats of primer may be necessary. Lightly sand the primed surface with fine-grit sandpaper (220 grit) to remove any imperfections before applying the base coat.
5. Drop Cloths and Masking: Protect the surrounding work area with drop cloths. Use painter’s tape to mask off any areas you don't want to paint, such as walls, countertops, or the interior of cabinets. This step is crucial for a clean and professional finish.
Selecting the proper tools is also part of the preparation process. Gather the following: paint brushes (both angled and flat), paint rollers (foam or microfiber with a short nap), paint trays, mixing sticks, clean cloths, and safety glasses. Ensure that brushes and rollers are clean and in good condition before starting.
Key Point 2: Applying the Base Coat and Paint Wash
The base coat provides the foundation for the paint wash effect and its color significantly impacts the final result. The paint wash itself is a diluted paint that is applied and then partially removed to reveal the base coat underneath. The steps below describe how to apply these two layers effectively.
1. Base Coat Application: Choose a base coat color that complements the desired paint wash color. Lighter base coats generally work well with darker paint washes, while darker base coats can be paired with lighter paint washes. Apply the base coat in thin, even coats using a brush or roller. Allow each coat to dry completely before applying the next. Two coats of base coat are typically recommended for full coverage and durability. Lightly sand between coats with fine-grit sandpaper (220 grit) to remove any imperfections and ensure a smooth surface.
2. Preparing the Paint Wash: The paint wash is created by diluting paint with water or a glazing liquid. The ratio of paint to water (or glazing liquid) depends on the desired level of transparency and the type of paint used. A common starting point is a 1:1 ratio (one part paint to one part water or glazing liquid). Experiment with different ratios on a test piece until the desired effect is achieved. Using a glazing liquid instead of water will extend the working time, allowing for more flexibility in blending and manipulating the paint wash. Choose a paint color for the paint wash that complements the base coat. Acrylic latex paint is generally recommended for paint washing kitchen cabinets.
3. Applying the Paint Wash: Apply the paint wash to a small section of the cabinet at a time. Use a brush to apply a thin, even layer of the diluted paint. Immediately after applying the paint wash, use a clean, lint-free cloth to wipe away some of the paint, revealing the base coat underneath. The amount of paint removed and the technique used will determine the final look. Experiment with different techniques, such as wiping in the direction of the wood grain, stippling with a sponge, or using a dry brush to create texture. Control the amount of pressure applied to the cloth to adjust the intensity of the paint wash effect.
4. Blending and Feathering: Pay close attention to blending the edges of the paint washed sections to avoid harsh lines. Use a clean, damp cloth to feather the edges, creating a seamless transition between the painted and unpainted areas. Continuously evaluate the overall appearance as you work, adjusting the technique as needed to achieve the desired effect. Work methodically, completing one section at a time, until all cabinet surfaces are covered.
5. Drying Time: Allow the paint wash to dry completely before applying a topcoat. The drying time will vary depending on the type of paint used and the humidity levels in the environment. Refer to the manufacturer's instructions for specific drying time recommendations.
Key Point 3: Protection and Reassembly
Once the paint wash has thoroughly dried, it is essential to protect the finish with a durable topcoat. Following the application of the topcoat, the cabinets can be reassembled carefully.
1. Topcoat Application: Apply a clear topcoat to protect the paint wash finish from scratches, stains, and moisture damage. Choose a topcoat specifically designed for cabinets or furniture. Water-based polyurethane is a popular choice due to its durability, low odor, and non-yellowing properties. Apply the topcoat in thin, even coats using a brush or roller. Allow each coat to dry completely before applying the next. Two to three coats of topcoat are generally recommended for optimal protection. Lightly sand between coats with fine-grit sandpaper (220 grit) to remove any imperfections and ensure a smooth surface.
2. Curing Time: Allow the topcoat to cure completely before reassembling the cabinets. Curing time is the time it takes for the finish to fully harden and reach its maximum durability. Refer to the manufacturer's instructions for specific curing time recommendations. Avoid placing heavy objects on the cabinets during the curing process.
3. Reassembly: Carefully reattach the hardware (knobs, pulls, and hinges) to the cabinet doors and drawers. Reinstall the cabinet doors and drawers onto the cabinet frames. Ensure that all doors and drawers are properly aligned and functioning smoothly. Adjust the hinges as needed to achieve proper alignment.
4. Inspection and Touch-Ups: Inspect the finished cabinets for any imperfections, such as missed spots or areas with uneven coverage. Touch up any imperfections with a small brush and the appropriate paint or topcoat. Allow the touch-up paint to dry completely before using the cabinets.
5. Cleaning and Maintenance: Clean the finished cabinets with a mild soap and water solution. Avoid using harsh chemicals or abrasive cleaners, as these can damage the finish. Regularly wipe down the cabinets to remove dust and grime. Inspect the cabinets periodically for any signs of damage or wear and tear. Address any issues promptly to maintain the beauty and durability of the paint wash finish.
In addition to these guidelines, safety precautions are an integral part of the process. Always work in a well-ventilated area to minimize exposure to paint fumes. Wear safety glasses to protect your eyes from paint splatters and sanding dust. Use a respirator mask when sanding or spraying paint to prevent inhalation of harmful particles. Dispose of used paint cans, brushes, and cloths properly according to local regulations.

Whitewashed Cabinet Makeover Confessions Of A Serial Do It Yourselfer

Customer Experience With Dixie Belle Paint Hometalk

Whitewashed Cabinet Makeover Confessions Of A Serial Do It Yourselfer

How To Bleach And White Wash Oak Cabinets

Light Whitewash Cabinets Medium Counter Top Dark Floor Too Streaky On To Chalk Paint Kitchen Painting Remodel

How To Bleach And White Wash Oak Cabinets

How To Clean Painted Kitchen Cabinets By Kayla Payne

How To Paint Kitchen Cabinets

Whitewashed Cabinet Makeover Confessions Of A Serial Do It Yourselfer White Washed Furniture Whitewash Cabinets Distressed Kitchen

How To Clean Kitchen Cabinets This Genius Trick Will Save You So Much Time
Related Posts