Redoing Your Kitchen Cabinets Yourself: A Comprehensive Guide
Transforming your kitchen cabinets can significantly enhance the overall aesthetic and functionality of your kitchen. Whether you're looking to revitalize old cabinets or create a completely new look, redoing them yourself is a rewarding and budget-friendly option. Here's a comprehensive guide to help you achieve stunning results:
Materials and Tools You'll Need
Before you begin, gather the necessary materials and tools, including:
- Primer
- Paint or stain of your choice
- Sandpaper (various grits)
- Screwdriver
- Drill
- Paintbrush or roller
- Hardware (new knobs, handles, or hinges)
- Tack cloth
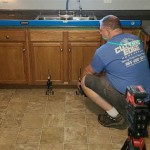
Step 1: Preparation and Disassembly
Protect your floors and work area with a drop cloth or tarp. Remove all cabinet doors and drawers by unscrewing the hinges and drawer slides. Label the doors and drawers so you can easily put them back in the correct location later.
Step 2: Cleaning and Sanding
Thoroughly clean the cabinet frames and doors to remove any grease or dirt. Use a tack cloth to remove any remaining dust or debris. Sand the surfaces lightly with 120-grit sandpaper to create a smooth base for the paint or stain.
Step 3: Priming and Painting
Apply a coat of primer to the cabinet frames and doors. Allow it to dry completely. Then, apply two coats of your chosen paint or stain, allowing each coat to dry thoroughly before applying the next.
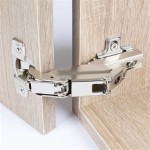
Step 4: Hardware Installation and Reassembly
Once the paint or stain is completely dry, install the new hardware. Reattach the cabinet doors and drawers, ensuring they open and close smoothly. Adjust the hinges and drawer slides as needed.
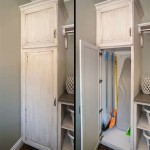
Step 5: Finishing Touches
To complete the transformation, clean the cabinets with a damp cloth to remove any smudges or fingerprints. Add decorative elements, such as trim pieces or moldings, to enhance the overall look.
Tips for Success
* Choose a high-quality paint or stain that is durable and resistant to wear and tear. * Take your time sanding and preparing the surfaces to ensure a smooth finish. * Use a paintbrush or roller specifically designed for cabinets to achieve a professional-looking result. * Allow ample drying time between coats to ensure proper adhesion and durability. * Don't be afraid to experiment with different colors or finishes to create a unique and personalized style.
15 Diy Kitchen Cabinet Makeovers Before After Photos Of Cabinets

21 Diy Affordable Ways To Redo Kitchen Cabinets Extra Space Storage

How To Paint Kitchen Cabinets In 7 Simple Steps

21 Diy Affordable Ways To Redo Kitchen Cabinets Extra Space Storage

Diy Kitchen Cabinets 25 And Easy Ideas For An Update Joyful Derivatives

Diy Painting Your Kitchen Cabinets The Right Way

21 Diy Affordable Ways To Redo Kitchen Cabinets Extra Space Storage

20 Diy Painted Kichen Cabinet Ideas A Cultivated Nest

25 Easy Ways To Update Kitchen Cabinets

Before And After Diy Kitchen Renovation Lemon Thistle
Related Posts