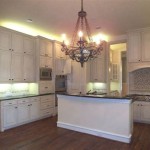
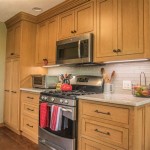
Transforming Old Wooden Kitchen Cabinets: A Step-by-Step Guide
Wooden kitchen cabinets, despite their classic charm, can over time appear outdated or worn. However, there's no need to replace them as they can be transformed to give your kitchen a fresh and modern look. Here's a comprehensive guide to help you rejuvenate your old wooden cabinets:
Step 1: Preparation
Before you begin, it's essential to thoroughly clean the cabinets to remove any grease or grime. Use a degreaser or a mixture of warm water and dish soap. Once clean, protect the floors and countertops with drop cloths.
Step 2: Refinishing or Painting
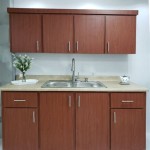
If the cabinets are in good condition, refinishing them is a great option. Sand the surfaces to remove any old finish, stain them to match your desired color, and seal them with polyurethane or lacquer. Alternatively, you can paint the cabinets using multiple layers of high-quality enamel paint. Allow ample drying time between coats.
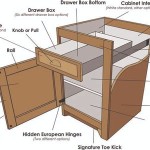
Step 3: Updating Hardware
New hardware can drastically change the look of your cabinets. Remove old handles and knobs and replace them with modern, sleek ones. Choose styles that complement the cabinet design and overall kitchen aesthetic.
Step 4: Adding Crown Molding
Crown molding can elevate the look of your cabinets, adding a touch of sophistication. Measure and cut the molding to fit the top of the cabinets, then secure it with nails or adhesive. Caulk any gaps and paint the molding to match the cabinets.
Step 5: Installing Under-Cabinet Lighting
Under-cabinet lighting provides additional illumination and makes your kitchen appear more spacious. Install LED strip lights or puck lights beneath the cabinets, connecting them to a power source. Ensure the lights are concealed to create a clean and polished look.
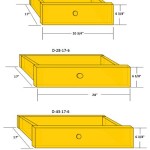
Step 6: Replacing Shelves and Drawers
If the shelves and drawers are outdated or damaged, consider replacing them. Choose durable materials such as plywood or melamine and ensure they fit the cabinet dimensions. Install the new shelves and drawers with screws or dowels, ensuring smooth operation.
Step 7: Personalization
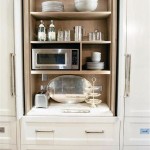
Add personal touches to your transformed cabinets. Display decorative items on open shelves, use chalkboard paint to create a message board on a cabinet door, or add glass inserts to showcase your favorite dishes. Personalization makes your kitchen truly unique and reflects your style.
Tips for Success:
- Use high-quality materials and finishes.
- Take your time and don't rush the process.
- Protect your work surfaces and surroundings.
- Consider consulting with a professional if needed.
- Enjoy the transformation and the renewed look of your kitchen.

15 Diy Kitchen Cabinet Makeovers Before After Photos Of Cabinets

25 Easy Ways To Update Kitchen Cabinets

How I Updated My Oak Cabinets Without Paint By Using Briwax Easy Budget Kitchen Makeover Only 24

15 Diy Kitchen Cabinet Makeovers Before After Photos Of Cabinets

Diy Painted Oak Kitchen Cabinets Makeover

How To Make Oak Kitchen Cabinets Look Modern Celeste Jackson Interiors

10 Simple Ideas To Update Your Kitchen Cabinets Jenna Sue Design

Kitchen Diy Shaker Style Cabinets Cherished Bliss

And Easy Diy Tweaks You Can Make To Transform Your Kitchen

How To Update Your Kitchen Cabinets For Under 200
Related Posts