Painting Wooden Kitchen Cupboards White: A Comprehensive Guide
Painting wooden kitchen cupboards white is a popular and cost-effective way to revitalize a kitchen space. This transformation can brighten the room, create a sense of cleanliness, and modernize the overall aesthetic. However, achieving a professional and lasting finish requires careful preparation, the selection of appropriate materials, and meticulous execution. This article provides a comprehensive guide to painting wooden kitchen cupboards white, covering each stage of the process in detail.
Key Considerations Before You Begin
Before embarking on the painting project, several key considerations must be addressed. These initial steps will help ensure a smooth and successful outcome.
Wood Type and Condition: Identifying the type of wood your cupboards are made of is crucial. Different wood types absorb paint differently and may require specific primers or preparation techniques. Solid wood, veneer, and laminate require individual approaches. Furthermore, assess the overall condition of the cabinets. Are there any existing layers of paint or varnish, signs of damage (chips, cracks, water damage), or areas with built-up grease and grime? Addressing these issues early will prevent problems later.
Style of Cupboards: The style of your kitchen cupboards influences the painting process. Flat-panel doors are generally easier to paint than raised-panel or intricately detailed doors. Consider how you will approach areas with complex moldings or carvings. Using appropriate brushes or spray equipment will be essential for achieving a uniform finish in these areas. In addition, the type of hinges and hardware attached to your cupboards can be the determining factor of if you decide to remove these parts for the painting process.
Choosing the Right White Paint: White paint is not created equal. There are numerous shades of white, ranging from bright, cool whites to warmer, creamier tones. Consider the existing color palette of your kitchen, including the countertops, backsplash, and flooring, when selecting the right white. Sample different shades in your kitchen's lighting to see how they appear at different times of the day. Also, consider the sheen or finish of the paint. Matte or eggshell finishes are less reflective and can help conceal imperfections, while semi-gloss and gloss finishes are more durable and easier to clean, making them suitable for high-traffic areas like kitchens. Consider durability and ease of cleaning when choosing a finish.
Work Space Preparation: Preparing your workspace is essential for a clean and efficient painting process. Designate a well-ventilated area for painting. If painting indoors, open windows and use fans to circulate the air. Protect surrounding surfaces with drop cloths or plastic sheeting. Ensure you have adequate lighting to clearly see what you are doing. A well-organized workspace minimizes distractions and helps prevent accidents.
Step-by-Step Guide to Painting Wooden Kitchen Cupboards
This section provides a detailed, step-by-step guide to painting wooden kitchen cupboards white. Each step is crucial for achieving a professional and durable finish.
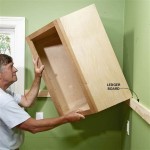
1. Removal and Labeling: Begin by removing all cabinet doors and drawers. Carefully label each door and drawer with its corresponding cabinet location. This is crucial for easy reassembly. Take photographs of the cabinet layout before removing anything to serve as a visual reference. Remove all hardware, including knobs, pulls, hinges, and latches. Store the hardware in labeled bags to prevent loss and confusion.
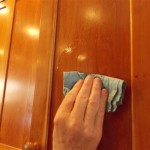
2. Cleaning and Degreasing: Thoroughly clean all cabinet doors, drawers, and frames with a degreasing solution. Kitchen cabinets accumulate grease, grime, and food residue over time, which can prevent paint from adhering properly. Use a strong degreaser specifically designed for kitchen surfaces. Scrub the surfaces thoroughly with a sponge or brush, paying particular attention to areas around handles and hinges. Rinse thoroughly with clean water and allow to dry completely.
3. Sanding: Sanding is a critical step in preparing the surface for painting. Use medium-grit sandpaper (120-180 grit) to lightly sand all surfaces. The goal is not to remove the existing finish entirely, but to create a slightly rough surface that the primer can grip. If the existing finish is particularly glossy or uneven, you may need to use a coarser grit sandpaper to start. After sanding, use a fine-grit sandpaper (220 grit) to smooth the surface and remove any sanding marks. Wipe down all surfaces with a tack cloth to remove any remaining dust.
4. Priming: Applying a primer is essential for achieving a uniform and long-lasting finish. Primer helps the paint adhere properly to the surface, seals any stains or imperfections, and prevents the existing color from bleeding through. Use a high-quality primer specifically designed for wood. Oil-based primers are generally recommended for their superior adhesion and stain-blocking properties, but water-based primers are also suitable for many projects. Apply the primer in thin, even coats using a brush, roller, or sprayer. Allow the primer to dry completely according to the manufacturer's instructions. Lightly sand the primed surface with fine-grit sandpaper to remove any imperfections and create a smooth base for the paint.
5. Painting: Apply the first coat of white paint using a brush, roller, or sprayer. Choose a high-quality paint that is specifically designed for cabinets and trim. Latex or acrylic paints are generally recommended for their durability, ease of application, and low odor. Apply the paint in thin, even coats, avoiding drips and runs. Allow the first coat to dry completely according to the manufacturer's instructions. Lightly sand the first coat with fine-grit sandpaper to remove any imperfections and create a smooth surface for the second coat. Apply the second coat of paint using the same technique as the first coat. Again, allow the paint to dry completely.
6. Curing: Once the final coat of paint is dry, allow the cabinets to cure for several days before reassembling them. Curing allows the paint to fully harden and become more durable. Avoid using the cabinets during the curing process to prevent scratches or damage. Follow the paint manufacturer's recommendations for curing time.
7. Reassembly: After the paint has fully cured, reassemble the cabinet doors, drawers, and hardware. Use the labels and photographs you took earlier to ensure that each piece is placed in its correct location. Reattach the hinges, knobs, pulls, and latches. Adjust the hinges as needed to ensure that the doors and drawers open and close smoothly.
Essential Tools and Materials
Having the right tools and materials is crucial for a successful painting project. This list outlines the essential items you will need:
Cleaning Supplies: Degreaser, sponges, scrub brushes, clean water, rags.
Sanding Supplies: Medium-grit sandpaper (120-180 grit), fine-grit sandpaper (220 grit), sanding block or orbital sander, tack cloth.
Priming and Painting Supplies: High-quality wood primer, paint (latex or acrylic), paintbrushes (various sizes), paint rollers (foam or microfiber), paint trays, paint sprayer (optional), painter's tape, drop cloths or plastic sheeting.
Safety Gear: Safety glasses, dust mask, gloves.
Other Tools: Screwdriver, drill, putty knife (for repairing imperfections), level.
Troubleshooting Common Problems
Even with careful planning and execution, problems can sometimes arise during the painting process. This section addresses some common issues and offers solutions.
Paint Dripping or Running: This is usually caused by applying too much paint at once. To prevent drips and runs, apply the paint in thin, even coats. If you do get drips or runs, let the paint dry completely, then sand the affected area smooth before applying another coat.
Brush Strokes or Roller Marks: To minimize brush strokes or roller marks, use high-quality brushes and rollers. Apply the paint in long, even strokes, and avoid pressing too hard. Consider using a paint sprayer for a smoother finish. You can also lightly sand between coats to remove any imperfections.
Paint Not Adhering Properly: This is usually caused by poor surface preparation. Make sure to thoroughly clean and sand the surfaces before priming. Use a high-quality primer specifically designed for wood. If the paint is still not adhering properly, you may need to strip the old finish completely and start over.
Paint Chipping or Peeling: This can be caused by several factors, including poor surface preparation, using the wrong type of paint, or not allowing the paint to cure properly. Ensure that the surfaces are properly cleaned, sanded, and primed. Use a high-quality paint that is specifically designed for cabinets and trim. Allow the paint to cure fully before using the cabinets.
Uneven Color Coverage: This can be caused by applying the paint in thin or uneven coats. Apply the paint in thin, even coats, and make sure to cover all surfaces completely. You may need to apply multiple coats of paint to achieve uniform coverage. Using a primer that is properly tinted can also help with coverage.

Best Paint For Cabinets 2024 24 Brands Blind Tested Reviewed

How To Paint Oak Cabinets And Hide The Grain Tutorial

How To Paint Oak Cabinets White Best Diy Guide 2024

Best Paint For Cabinets 2024 24 Brands Blind Tested Reviewed

How To Paint Fake Wood Kitchen Cabinets Simple Made Pretty 2024

Tips Tricks To Paint Honey Oak Kitchen Cabinets Cottage Living And Style

Pros And Cons Of Painting Kitchen Cabinets White De Manor Farm By Laura Janning

Painting White Kitchen Cabinets To Look Like Wood Repainting Makeover

Ask Maria Help My White Painted Kitchen Cabinets Look Bad Advice For Homeowners

Painted Cabinets Nashville Tn Before And After Photos Brown Kitchen Painting White
Related Posts

